
Backend Operations
Last Updated: 07 Jul 2017
When Alternate Contexts are configured on the Contexts Configuration screen, additional fields become available within Squiz Matrix, allowing you to further configure and edit the contexts in the system.
Editing Content With Contexts
The Context Switcher
When Alternate Contexts have been created, the Context Switcher will appear in the top header of the Admin Mode interface.

This tool allows you to enter into either the Default Context or any available Alternate Contexts when editing and reviewing assets. By selecting an alternate Context, you can establish alternate versions of an asset by creating unique Context specific content. By default, all assets will be displayed in the Default Context.
To enter into a different Context, click on the Context Switcher button. A list of available contexts will become available.
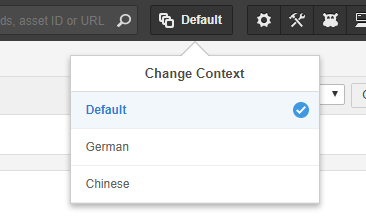
Clicking on an option from the list will switch the interface to the selected Context.
If you have selected an Alternate Context that has not yet been customised, the information and content displayed will be the same as that on the Default Context. Any changes made to an Alternate Context will remain unique to that specific context.
You can set the back-end context being edited by appending the query string parameter SQ_ACTION=set_backend_context&SQ_CONTEXT_NAME=name of context to the URL of the asset. This parameter can also be utilised in Simple Edit Mode interfaces, to switch between the contexts being edited.
Editing Screens and Content in an Alternate Context
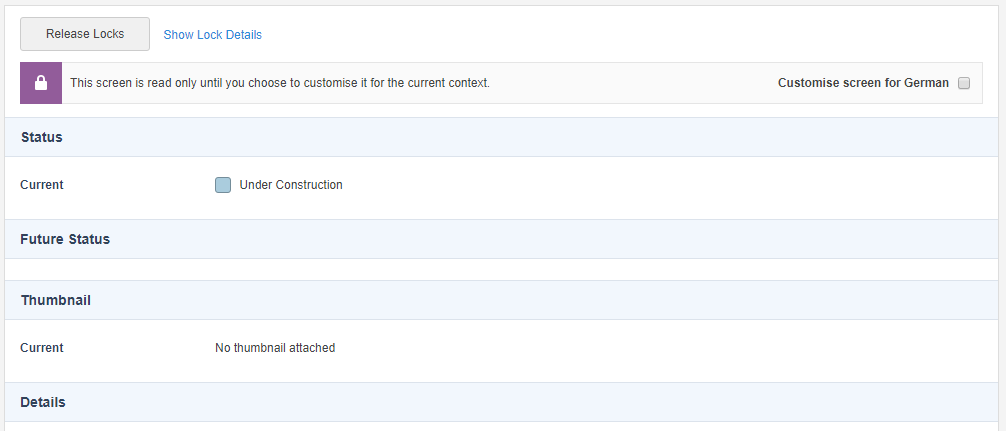
Once you enter into an Alternate Context, all fields and editable areas will be read-only until you specifically select to customise a screen for that Context.
For example, if you enter an Alternate Context and visit the Details screen of an asset, all fields will be read-only with a checkbox option to Customise the current screen.
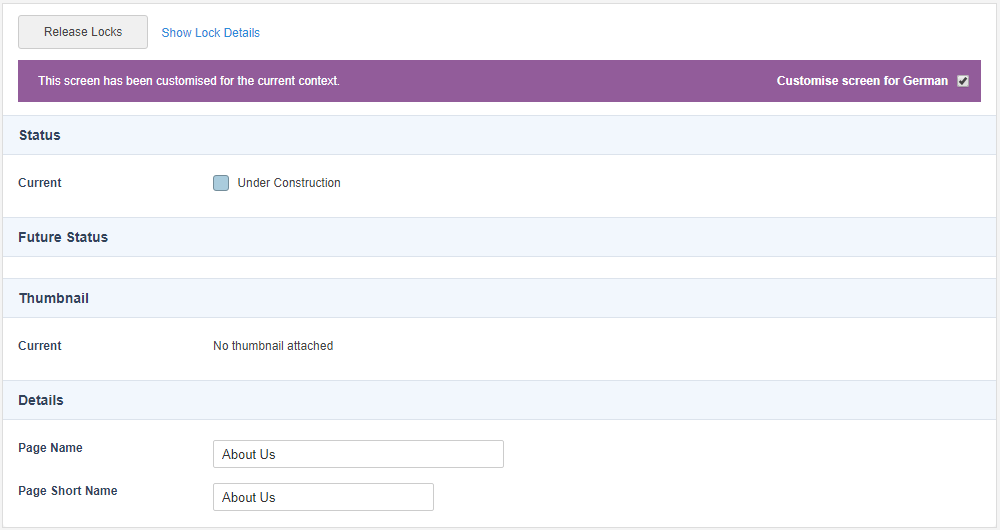
If you tick this option and save the screen, only the fields that support Context Customisation will be available for editing.
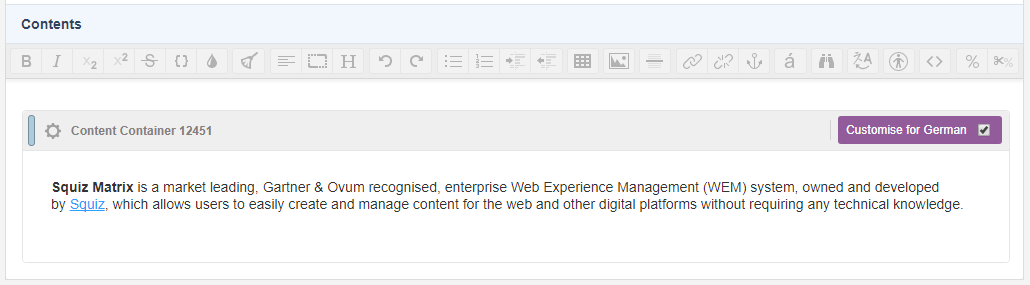
Similarly to When you edit the contents of assets that support Content Containers, such as Standard Pages, you can also customise the contents of each individual Content Container.
Reverting Content for an Alternate Context
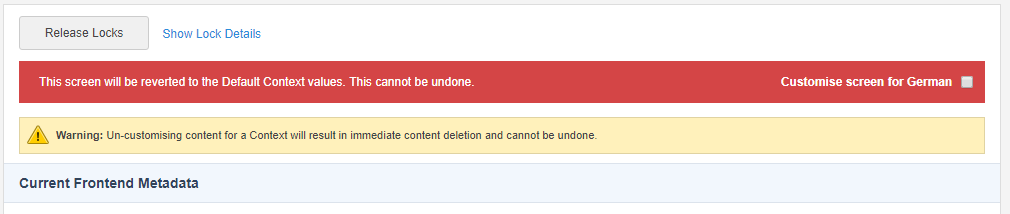
Screens and content that has been customised for an Alternate Context can also be reverted to use the values of the Default Context.
For example, if you want the Metadata of an asset to no longer have customised values for the current selected Alternate Context you are in, you can untick the Customise checkbox. In doing so, a warning will appear telling you that this will delete all the customised values for that Context and cannot be undone.
Keyword Replacement Values Across Contexts
Keyword replacement values can be returned across the contexts of a site through the following format:
%<asset_keyword>^context:<context_name>%
Where <asset_keyword> is a contextable keyword replacement and <context_name> is the name of the context to return the asset value from. For example, the keyword replacement:
%asset_attribute_name^context:French%
will return the name of the asset in the French context.
Setting Metadata Field Values and Defaults Across Contexts
When using Alternate Contexts within a system, metadata values can be configured individually over multiple contexts and default values can be set for each of these contexts.
Metadata must be manually regenerated on each newly created context before it will be applied.
Setting metadata values and defaults over multiple contexts is done in a similar fashion to editing the contents of an asset, as shown earlier in this chapter.
Using the Context Switcher tool, select a context that you want to edit the metadata for. If you have selected an Alternate Context that has not yet had metadata values and defaults edited, the information displayed will be the same as that on the Default Context. Any changes made to the Metadata Field values and their defaults will remain unique to the selected context.
Please note that the Field Name and metadata Options on the Details screen of a Metadata Field are not contextable.
Alternatively, Metadata Fields can be configured to be Non-Contextable. This is done using the Contextable option on the Details screen of a Metadata Field:

Setting this field to No will maintain metadata values across all contexts. This is useful when setting important numeric metadata values for information such as product quantities and pricing in an e-commerce store.
By default, all Metadata Fields are Contextable when they are first created.
Using Paint Layouts on Sites with Multiple Contexts
When using Paint Layouts on a multiple context Site, these layouts are rendered by the currently viewed context, displaying the Paint Layout's corresponding context. This allows you to customise the contents of the layout for each context.
For example, if a Site has been created with three contexts: the Default English Context, a French Context and a Japanese Context. A Paint Layout can be used on the Site to display update information at the bottom of each page, titled Last Updated. As the Site is in multiple languages, the Paint Layout can be configured for each context to display this information in the appropriate language.
When a user views the Site on the Frontend, the Paint Layout displayed will be determined by the context of the Site they are viewing. For example, if a user from France views the French Context of the Site, the French Context of the Paint Layout will also be displayed.
Contexts on the Preview Screen
When previewing an asset on the Preview screen, the Context field gives you the ability to switch between the contexts available for the asset. This allows you to preview all versions of an asset. Please note that if Alternate Contexts have not been created in your system, the Context field will appear blank.
When no Context field is available, the system's Default Context will always be displayed. On a system where Alternate Contexts have been created, a drop down list will be displayed, as shown in the figure below.
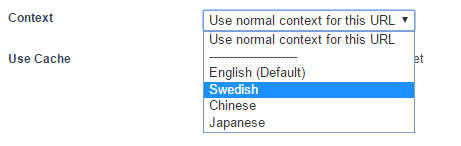
The following options are available in the Context field:
- Use normal context for this URL: This will display the asset in the Base Context of the URL being previewed. By default, this will be the system's Default Context.
- Default Context: This will display the asset in the system's Default Context.
- Alternate Context(s) : The available Alternate Contexts in the system will be listed below the Default Context. Selecting an Alternate Context will then preview the asset in that specific Context.
To review a context on the Frontend, append the query string parameter SQ_ACTION=set_context&SQ_CONTEXT_NAME=name of context to the URL of the asset. You can also clear the context of a page with SQ_ACTION=clear_context.
Setting Base Contexts for Site URLs
When Alternate Contexts have been created, the Base Context field is made available on the URLs screen of Site assets, allowing contexts to be assigned to specific Site URLs. These Base Contexts will then be used as the default context for that URL and will be displayed if no Alternate Contexts' conditions are met. By default, the Base Context of all URLs will be the system's Default Context.
To change the Base Context of a URL, select a context from the list and click Save. This context will then be used as the default context for the Site.
Separate URLs for Multiple Contexts
Base Contexts can be utilised by creating multiple URLs, catering to specific Alternate Contexts.
In the example below, a Site has been configured with three different URLs for each of its language Alternate Contexts. Please note that no conditions have been set for these contexts.
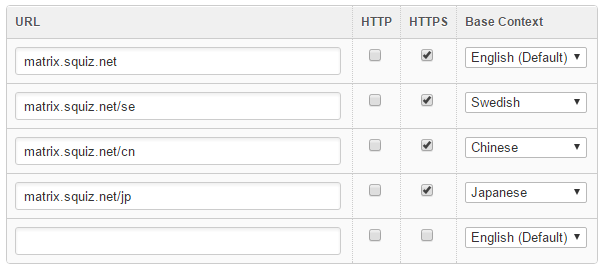
When the Site is viewed on the front-end, each URL will display the selected Base Context. The configured URLs can then be used as links, allowing users to manually change the context of the Site.
Setting the Login Context for User Groups
When you have multiple contexts on a system, it can be useful to configure certain User Groups to be automatically assigned to a specific context when they first log into Squiz Matrix.
For example, say you have a multi-language site with both English and French versions and two corresponding User Groups of content editors for each language. You can configure these two User Groups so that the English Content Editors will be logged into the English context of the system, while the French Content Editors will be logged into the French context of the system.
To do this:
- Go to the Preferences screen of the User Group.
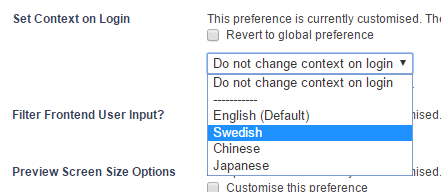
- Under the User Preferences section, select Customise this preference for the Set context on login preference and click Save. An additional field will appear in this section, listing the available contexts on your system in a drop-down menu, as shown in the example above.
- Select the context you want this User Group to be automatically logged into and click Save. The users within this User Group will now be logged into the selected context when they first access the system. Selecting Do not change context on login will log users in using the context assigned to the URL used to access the system.
This preference also assigns contexts to User Groups when viewing Sites on the Frontend. For example, in this Site we also have two User Groups of registered users, English Users and French Users. Configuring this preference for these two User Groups will mean that the English Users will be logged into the English version of the Site, while the French Users will be logged into the French version of the Site.
These preferences can be set globally via the Global Preferences screen. For more information on user preferences, refer to the Global Preferences chapter in the System Configuration manual.