Editing an Image
Last Updated: 14 Jun 2018
This page describes the unique editing functionality of the Image asset.
Details Screen

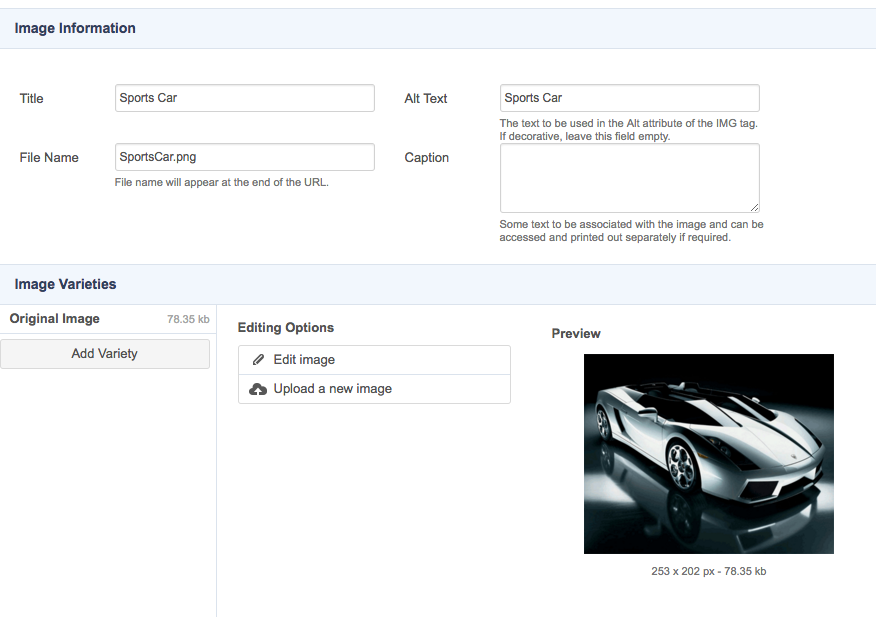
Image Information
This section allows you to upload a new image to overwrite the Image asset as well as set the title and caption of the image. The following fields are available:
- Title: enter a Title for the Image. By default, the Title that was entered into the Title field when the Image was created will appear in this field.
- Alt Text: enter Alt Text to use for the Image. This text is used as the Alt attribute of the IMG tag. By default, the Alt Text that was entered into the Alt field when the Image was created will appear in this field.
Tip: If the Image is being used within the content of a page, the Alt Text of that Image will not be updated when you change the Alt Text on an Image asset. For example, if you have inserted an image on the Home Page of your site and change the Alt Text of that image, the Alt Text displayed on the Home Page will not reflect that change.
- Caption: enter a short summary or Caption of the Image. This caption can be displayed on the frontend using the keyword replacements. By default, the Caption that was entered into the Caption field when the Image was created will appear in this field.
- File Name: enter a file name for the Image. By default, the name of the image file that was used when the Image was created will appear in this field.
- Upload: this field allows you to upload a new image to overwrite the existing version of the Image asset. To upload a new image, click on the Browse button - the File Upload pop-up will appear. Locate the image that you want to use, left click on it and click on the Open button. The path of the image that you have selected will appear in this field.
Image Varieties
This section lists the current Varieties and allows you create new Varieties of the Image Asset.
Current Varieties
On the left of the Image Varieties section is the list of current Varieties with the Add Variety button.
Selecting the Add Variety button creates a new Variety in the list and displays the options available to the right. The available options are:
Variety Name: The name of the new Variety
Variety Type: There are two types of Variety that can be created
- Dynamic: allows you to create a variety based on the original Image adhering to one of the following constraints:
- Width: allows you to set the width, the height will be auto adjusted
- Height: allows you to set the height, the width will be auto adjusted
- Both: set the maximum pixel value that will be used for both width and height.
- Square Centred Crop: set the width of the square used for cropping from the centre of the image.
- Custom: set the width and height of the variety.
- Custom: allows you to create a variety from the following options
- Edit Image: allows you to edit the image, see the Editing Options below.
- New image from original: creates a new image based on the original image.
- Upload a new image: allows you to upload a new image, see the Editing Options below.
Editing Options
- Edit Image: selecting this will open the Image Editor. See the Image Editor section below.
- Upload a new image: allows you replace the current image by uploading a new file from your computer.
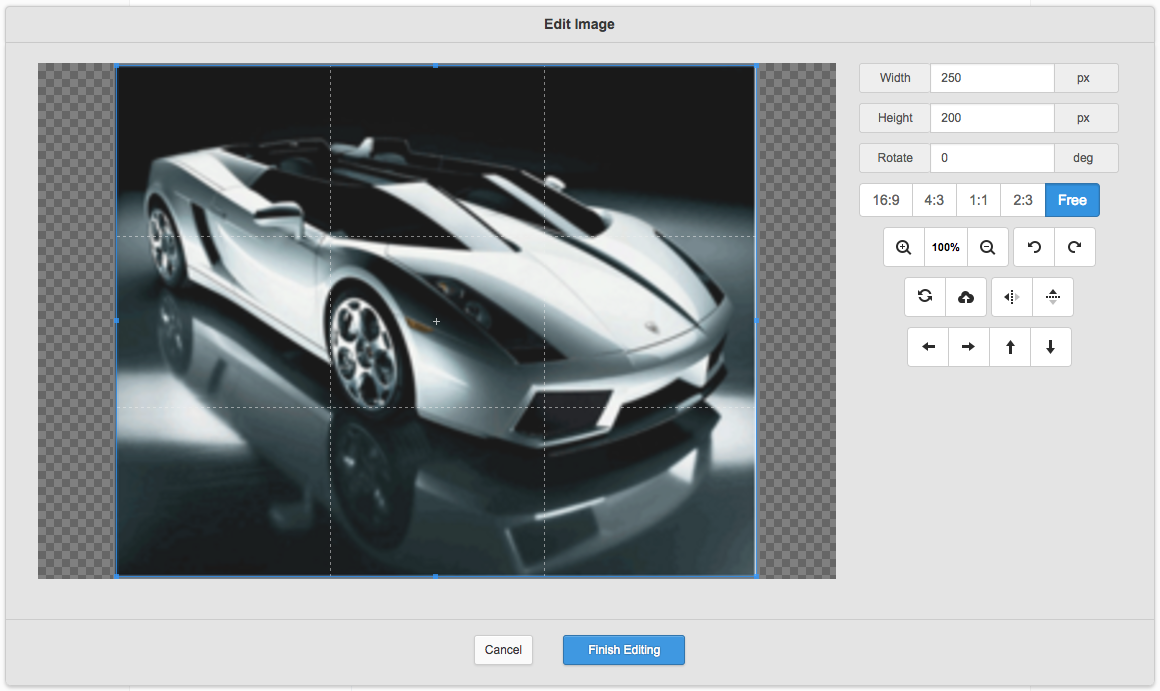
Image Editor
The Image Editor allows you to manipulate images within Edit+. It provides options to allow you to perform simple image editing in browser. The image is shown on a canvas with a marquee along with various other options on the right of the editor.

Adjusting the marquee allows you to crop the image to hide unwanted sections of the original image.
The following options are available to further edit the image:
- Width: the width of the marquee in pixels. Updates as you resize the marquee or can be set manually.
- Height: the height of the marquee in pixels. Updates as you resize the marquee or can be set manually.
- Rotate: allows you to set the rotation of the image in degrees.
- Aspect Ratio: allows you to set the aspect ratio of the marquee. Available options are: 16:9, 4:3, 1:1, 2:3 and Free.
- Zoom levels: allows you to set the Zoom level of the image. Available options are zoom in, set zoom to 100% and zoom out.
- Undo/ Redo: allows you to undo and redo edits you have performed to the image.
- Reset: allows you to resets the edits you have performed to the image.
- Upload Image: allows you replace the current image by uploading a new image file from your computer.
- Flip Image: allows you to flip the image. Available options are horizontal and vertical.
- Move Image: allows you to move the image 10 pixels at a time. Available options are left, right, up and down.
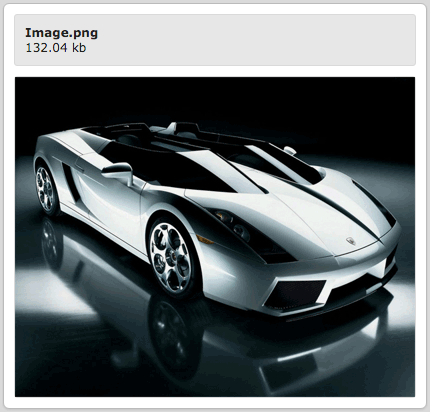
Previewing the Image
To view the content of the Image, click the Preview button on the Mode Switcher in the tool bar at the top of the screen. The Preview screen for the Image asset will appear, displaying the image and the name and size of the Image, as shown in the figure below.

