Steps to Creating a Design
Last Updated: 17 Dec 2015
There are a number of steps that need to be performed to get a design working within Squiz Matrix. Listed below are the steps that need to be followed.
Bookmarks to the headings on this page:
Step 1 - Create a Static HTML Version
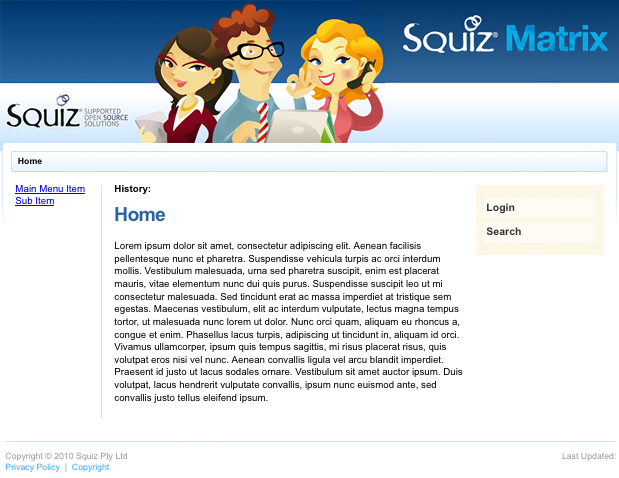
The first step in creating a design in Squiz Matrix is to create a static HTML version. An example of a static HTML file that has been created can be seen in the Appendix: Example Static HTML File. Placeholders (i.e. HTML comments and dummy content) are used within the design to indicate where the Squiz Matrix design tags need to be placed (for more information on the design tags refer to the Design Tags chapter). The design that this code produces is shown in the figure below.

An example Design
Referencing Files in the Static Design
Most HTML designs have a number of files that are used for formatting purposes, for example, images and cascading style sheets.

An example Design structure
When creating the static HTML version of the design, it is recommended that these files are stored in a folder called mysource_files. When a file needs to be referenced in the HTML, mysource_files/<filename> is used. For example, if you have an image called image.jpg and want to reference it in the HTML file, the following code can be used:
<img src="mysource_files/image.jpg" />The structure that was used when creating the example design above is shown in the figure to the right. The static HTML file is called parse.html and the files that it references are stored in the folder called mysource_files.
Once these files have been uploaded into Squiz Matrix, it will automatically replace any instance of mysource_files in the HTML code that is generated, with the correct URL of the file. If the files have not been referenced using mysource_files, Squiz Matrix will not replace the code with the correct URL and the design may be broken.
Step 2 – Uploading the Files into Squiz Matrix
Once a static HTML file of the design has been created, it needs to be uploaded into the system. To do this, create a Design asset under the Designs Folder in the Asset Map and upload the static HTML file and its associated files from the mysource_files folder into the system. For more information on the Design asset, refer to the Design Asset chapter in this manual.
Uploading the Static HTML File
Once a Design asset has been created, go to the Details screen. In the Parse File section, select the static HTML file in the Upload field and click Commit. The static HTML file will be uploaded into the system.
Uploading the Associated Files for a Design
Once a Design asset has been created, go to the Details screen. In the Associated Files section, select the files from the mysource_files directory and click Commit. Only two files can be selected at once.
Example design
Alternatively, create a tar archive (.tar) or gzipped tar archive (.tar.gz or .tgz) file that contains the files from the mysource_files directory and upload one file instead. Squiz Matrix will extract the files and place them into the files directory.
Once the files have been uploaded they will appear under the Design asset in the Asset Map. The figure to the right shows some of the associated files for the example design in the Asset Map.
Step 3 – Add the Required Design Areas to the Design
Once a Design asset has been created, the required design areas need to be added. Design areas are Squiz Matrix XML design tags that are added to the HTML of a design to allow for the creation of dynamic content. These areas are parsed by the system and are replaced with the correct HTML to produce the layout that is seen on the frontend of the site. There are a number of different design areas that are available, with each one adding a different element to the design. For example, the Body design area adds the content of the asset into the design. Appendix: Example Parse File shows the parse file for the example design once the design areas have been added.
Step 4 – Status and Permissions for a Design
In order for the public to see the design of the Site, the Design asset, its associated files and any Design Customisations need to be Live and Public Read Permission granted.
Step 5 – Applying a Design to a Site
Once the Design has been set up, it needs to be applied to the Site or a page in the Site. To apply a Design, go to the Settings screen of the asset. In the Designs section, select the Design in the System Defined Fronted Design and click Commit. For more information on the Settings screen, refer to the Asset Screens manual.
