
How To Create an Online Quiz
Beginner
04 Oct 2016
The following example will take you through the steps of creating an Online Quiz. The quiz will have a form for users to input their details before beginning the quiz and the quiz itself will contain five multiple-choice questions. Once a user has finished the quiz, their results will be displayed and an email will be sent to their inbox.
Creating the Online Quiz

- Add an Online Quiz asset somewhere under your Site, titled MATR 101. The quiz will appear in the Asset Map, as shown in the figure to the right.
- Under the Online Quiz, create a Folder titled MATR 101 Questions. The questions for the quiz will be stored in this Folder.
Setting Up the User Details Form
Adding Questions
- Right click on the User Details Form asset and select the Details screen.
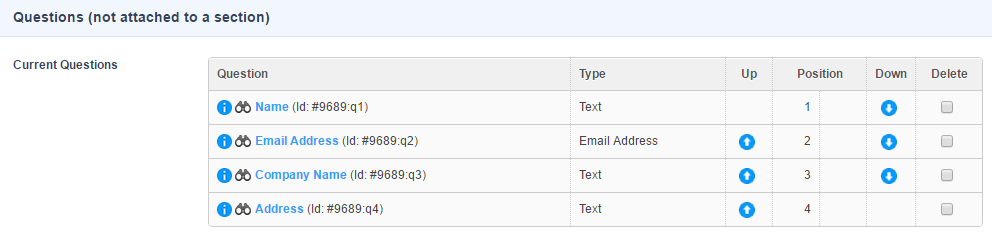
- In the Questions (not attached to a section) section, add the following questions in the Add Questions field:
i) Name (Text type)
ii) Email Address (Email address type)
iii) Company Name (Text type)
iv) Address (Text type)
Save the screen and you should see the questions listed in the Current Questions section, as shown in the example below. The questions will also be added under the User Details Form in the Asset Map.
Formatting the Layout of the Questions
Next we'll configure the display format of how each question within the quiz form.
- Go to the the Details screen of the User Details Form asset.
- In the Customise Format field, select Yes and Save the screen. The Format Bodycopy should now appear under the User Details Form in the Asset Map.
- Right click on the Format Bodycopy and select the Edit Contents screen.
- Enter the content similarly to the example shown in the image below. Remember to change the Asset IDs so that they match the IDs in your own system.
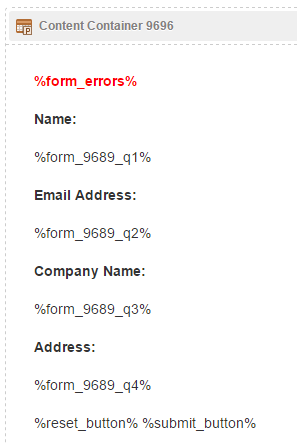
Do not forget to add the Form Errors and Submit Button keyword replacements into the form.
Making Questions Mandatory
We want to make the Name and Email Address fields mandatory to fill out before the user can complete the quiz. To do this:
- Right click on the Name question under the User Details Form in the Asset Map and select the Details screen.
- In the Required Entry field, select Required. This will mean that user will be required to answer this question on the form.
- In the Custom Required Error field, enter Please enter your name. This will be displayed on the form if the user does not answer the question.
- Repeat the above steps for the Email Address question to also make it a required field.
Setting Up the Quiz Questions
Next we'll create the questions for the actual quiz.
- Add an Online Quiz Multiple-Choice Question asset under the MATR 101 Questions Folder and give it a name of Question 1.
- On the Details screen of the newly created question, enter the question in the Question Text field. For example:
"Which of the Statuses listed below is <strong>not</strong> a Status in Squiz Matrix?"
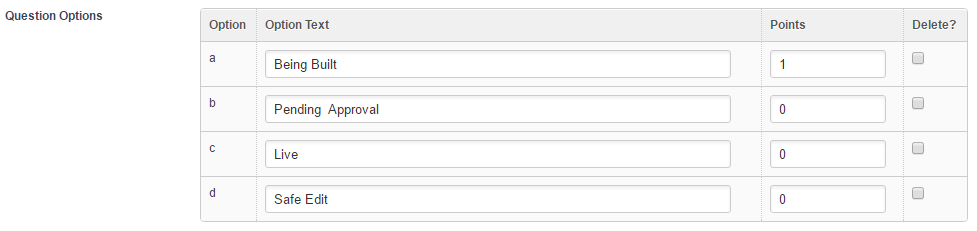
- Scroll down to the New Option field and enter "Being Built" as the first answer option for the question.

- Save the screen and the option should now be listed under the Question Options section, as shown in the example below:

- Repeat the above 2 steps to add three additional options for the question including:
- Pending Approval
- Live
- Safe Edit
- After all possible options have been added, we now need to set one as the correct answer. To do that, we'll use the Points field. The Points field for each answer is the number value a user will be awarded for selecting a specific option on the quiz. Being Built is obviously the right answer for this Question, so we'll enter "1" as its Points value for it so that the user gets awarded 1 point for selecting it as their answer.
- Repeat the above steps to add three more questions to the Online Quiz.
Configuring the Online Quiz
Now that we have our questions created and their options and correct answers set, we just need to quickly configure the Online Quiz asset to tell it where to source questions and user detail form fields from.
- Tight click on the Online Quiz in the Asset Map and select the Details screen.
- In the Question Pool field, select the MATR 101 Questions Folder as the root node to draw question assets from.

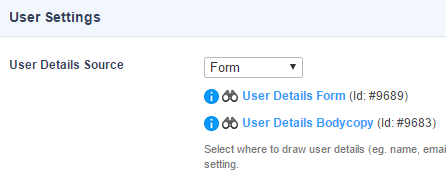
- In the User Details Source field, select Form. This will mean that the user will have to enter their details even if they are logged in.
Defining the Layout of the Online Quiz
With our Quiz configured, we can now focus on the frontend layout of the Quiz including the email format. We'll need to configure four layouts:
- User Details
- Page Contents
- Thank You Page
- Email Format
User Details Bodycopy
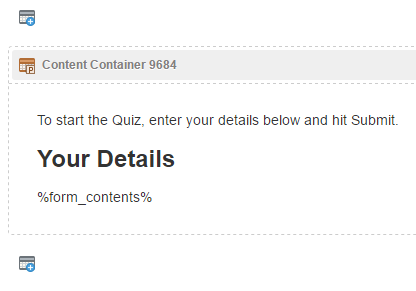
The User Details Bodycopy determines the layout of the User Details Form, allowing users to input their details before beginning the quiz.
To change this layout:
- Right click on the User Details Bodycopy and select Edit Contents.
- Configure the content to be similar to the example below:
Page Contents Bodycopy
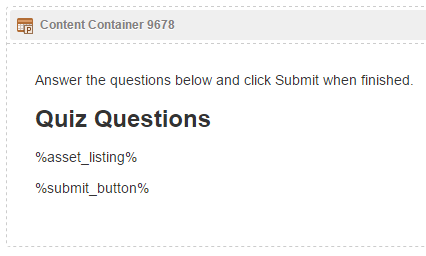
The Page Contents Bodycopy determines the layout of the Online Quiz and its questions.
To change this layout:
- Right click on the Page Contents Bodycopy and select Edit Contents.
- Configure the content to be similar to the example below:
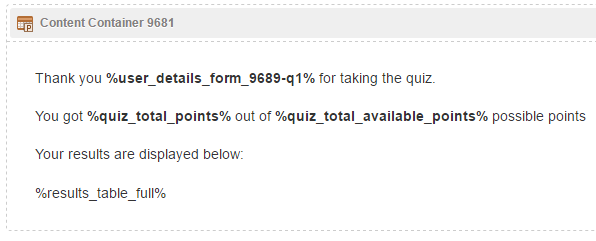
Thank You Bodycopy
The Thank You Bodycopy determines the layout of the Thank You page, displaying the user's quiz results.
To change this layout:
- Right click on the Thank You Bodycopy and select Edit Contents.
- Configure the content to be similar to the example below:
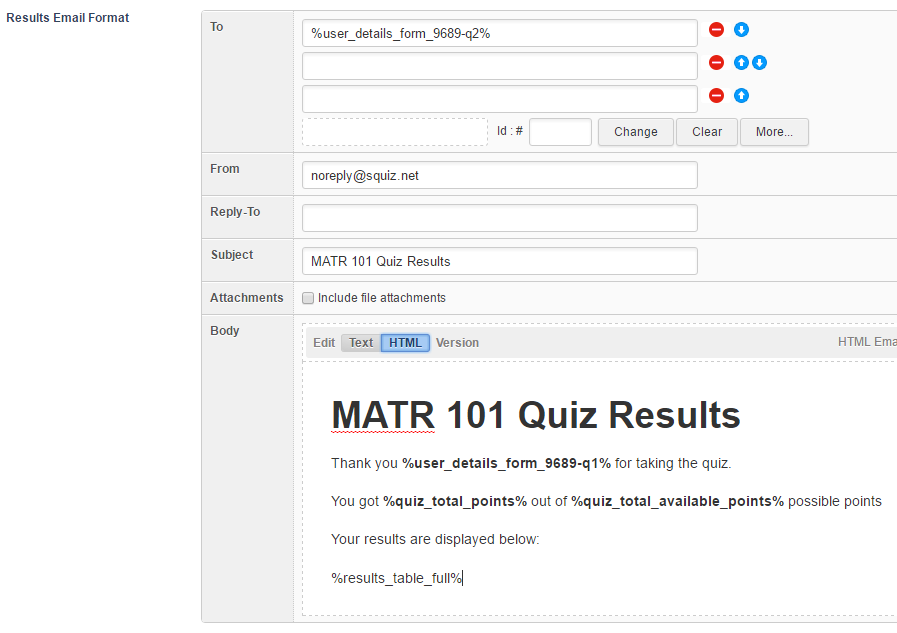
Formatting the Email
The email settings need to be configured so that an email is sent to the quiz user with their results. To do this:
- Right click on the Online Quiz in the Asset Map and select the Details screen.
- Scroll down to the Email Settings section of the screen.
- In the To field, enter the keyword replacement for the Email Address question on the User Details Form. In our example this would be %user_details_form_9689-q2% (where 9689 is the asset ID of the User Details Form and q2 is the question ID of the Email Address question).
- In the From field, enter the 'From' email address. For example, noreply@squiz.net.
- In the Subject field, enter a subject for the email. For example, MATR 101 Quiz Results.
- In the Body field, configure the content to be similar to the example below (similar to our Thank You Bodycopy layout):
Using the Online Quiz
Our Quiz is now finished and ready for testing. Make sure you make all assets Live and view the MATR 101 Online Quiz asset on the front end. The user experience should be similar to the following flow:
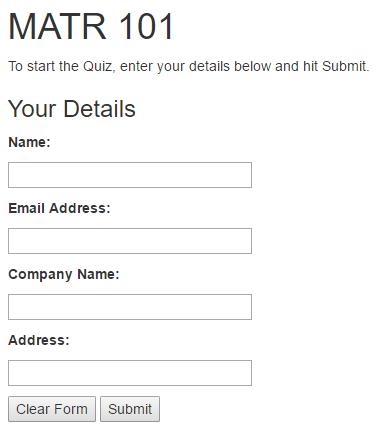
- First, the user will see a form to fill out their details as defined in the User Details Bodycopy.
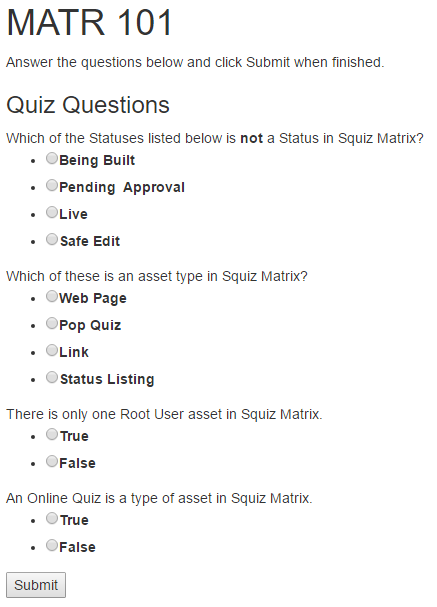
- After the user has filled out their details and clicked the submit button, they will see the actual Quiz and a list of all the questions as defined in the Page Contents Bodycopy.
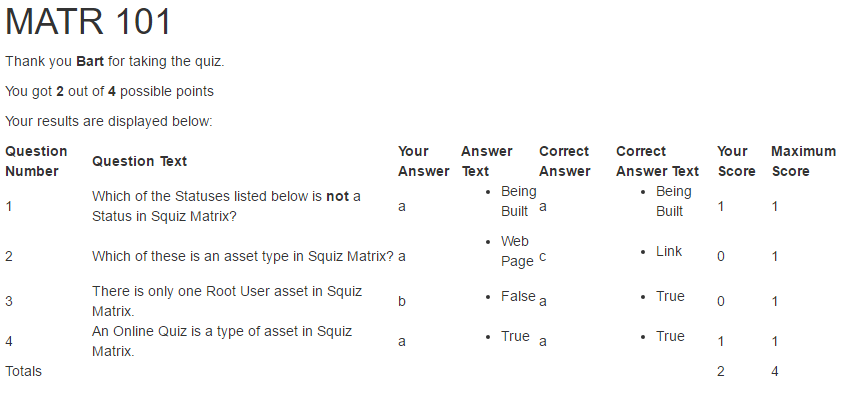
- From here the user can complete the quiz and click the submit button. Their results are then displayed on the screen as defined in the Thank You Bodycopy.
- A results email with the same layout is also sent to the email address the user specified on the User Details Form.
You can download the assets used in this tutorial below and import them into your own Matrix system using the Import Assets from XML Tool.