
Sections
Last Updated: 07 Mar 2017
Sections allow you to group similar questions together for a Custom Form. For example, if you have a group of questions for the users contact details you can group them under a section called Contact Details. One major advantage of using sections is that you can Clone or Link a section in the Asset Map to another Custom Form. This allows you to reuse questions within your system. You cannot Clone or Link a question that has not been created in a section.
Bookmarks to the headings on this page:
Adding a Section
To add a section to the Custom Form, right click on the Form Contents asset in the Asset Map and select Form Contents. In the Sections part of the screen, enter the name of the section in the Add Sections field and click Commit. The section will be listed in the Current Section list, as shown in the figure below.

The Current Sections list
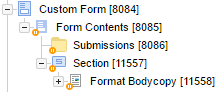
A Section asset will also appear in the Asset Map, as shown in the figure to the right. You can add as many sections as you want to the form.

A Section asset
For each section added, the name of that section is listed in Current Sections. When you click on the section name, the Details screen will be displayed where you can add questions to that section. For more information about the Details screen, refer to the Editing a Section part of this chapter.
Once you have added a section to the Custom Form, you can configure its settings on its associated asset screens.
Details Screen
The Details screen allows you to add questions and sections to the Section as well as customising the widths of the questions in the section. For more information about the Status, Future Status and Thumbnail sections, refer to the Details Screen chapter of the Asset Screens manual.
Details
By default, the name that was entered when the section was created will appear in this section. The Details section of the Details screen is shown in the figure below.

The Details section of the Details screen
You can change the name of the section by clicking into the Name field and entering the new name for the section.
Questions
This section allows you to add questions to a section. The Questions section of the Details screen is shown in the figure below.

The Questions section
By default, no questions will be listed, as shown in the figure above. To add a question, select the question type in the Add Questions field, select how many questions to add of this type (for example if you want to add two questions of type text to the form, select 2 from the list) and click Commit. The questions will be listed in the Current Questions section, as shown in the figure below.

The Current Questions list

Question assets
A Question asset will also appear in the Asset Map under the Section asset for each question added, as shown in the figure to the right.
For each question listed, the following information is shown:
- Question: this shows the name of the question. When you click on the question name, the Details screen will be displayed where you can modify the settings for that question. The content of the Details screen will depend on the type of question you have selected. For more information about the Details screen of each question type, refer to the question type chapters in this manual.
- Type: this shows the question type that has been added
- Delete: this field allows you to delete a question from the form. To do this, click on the box and click Commit. Alternatively, if you want to delete all questions on the form, click the box at the top of the column and click Commit.
- Move: this field allows you to re-order the questions for the form. Click on either the
 up or
up or  down arrow to move the question. Once you have re-ordered the questions, click Commit.
Tip: When you re-order the questions remember to click Commit. If you do not click Commit, the system will not save the order of the questions.
You can add additional questions to the form by using the Add Questions field.
Nested Sections
This section lists the sections that have been added to the current section and allows you to add new sections. By default, no sections have been added. The Nested Sections section of the Details screen is shown in the figure below.

The Nested Sections section

A nested Section asset
To add a section, enter the name of the section in the Add Sections section and click Commit. The section will be listed in the Current Section list. A Section asset will also appear in the Asset Map, as shown in the figure to the right. You can add as many sections as you want to the form.
For each section added, the name of that section is listed in Current Sections. When you click on the section name, the Details screen will be displayed where you can add questions to that section.
Section Widths
This section allows you to customise the widths for the questions that have been added to this section. The Section Widths section of the Details screen is shown in the figure below.

The Section Widths section
- Customise Format: If enabled, a new custom Format Bodycopy asset will be created in the Asset Map allowing you to customise the format and layout of this form section.
When you disable this option, a default format will be used and the customised Bodycopy will be deleted. - Section Width: Enter the width for the section when displayed on the Custom Form. Select Pixels from the list provided to specify an absolute value for the width, or Percent to specify the width as a percentage of the width of the window.
- Question Width: Enter the width of the column used for the Title of the questions. Select Pixels from the list provided to specify an absolute value for the width, or Percent to specify the width as a percentage of the window.
- Answer Width: Enter the width of the column used for the answer fields for the questions. Select Pixels from the list provided to specify an absolute value for the width, or Percent to specify the width as a percentage of the window.
Step Actions Screen
The Step Actions screen allows you to create custom actions that are run on a step or page (i.e. Section) of a multi-page Custom Form. These actions include sending a message to a remote SOAP server on completion of a form step.The Existing Actions, Add New Action and Select Action sections of the Step Actions screen are shown in the figure below.

The Step Action screen
Adding a Make SOAP Call Action
To add a new step action to send a message to a remote SOAP Server, check the Create a new action of type option in the Add New Action section, select the Make SOAP Call and click Commit.
The Make SOAP Call action supports both SOAP 1.1 and SOAP 1.2 standards. Please note, however, that WS-Security features and MIME multi-part attachments are not currently supported by this step action.
The action will be added to the Existing Actions section, as shown in the figure below.
 The Make SOAP Call Step Action
Additional fields will also appear in the Selected Action section, as shown in the figure below.
 The Selected Action section for the Make SOAP Call Step Action
The Make SOAP Call Step Action works in a similar manner to the Custom Form's Make SOAP Call Submission Action. For more information on how to configure these settings, refer to the Form Contents chapter in this manual.
Deleting a Section
To delete a section from the Custom Form, either move the Section asset to the Trash or click on it in the Asset Map and press the Delete key on the keyboard. This will delete the section as well as any questions that have been added to that section.