
How to integrate OneSignal web push notifications in Matrix
Advanced
28 May 2019 For version 5.4.0.0
This tutorial will take you through an example of how to integrate Matrix with OneSignal to send push notifications to your customer's desktop or mobile web application.
Matrix can easily integrate with OneSignal's web API. This allows custom notifications to be sent automatically from OneSignal via mobile native push, web push, email, and in-app messages, based on events triggered within Matrix.
Prerequisites
For this tutorial, you will require:
- A OneSignal account - details on how to set this up are provided in the instructions below.
- A Matrix site on which to configure OneSignal push notifications - you must have admin permissions granted on this Matrix site.
To complete the last section of this tutorial on setting up a push notification from an event-based trigger in Matrix:- Your Matrix account type must be system administrator and your user account located within the System Management > System Administrators user group.
- Your Matrix site must be secured with SSL.
This Matrix site must also be accessible from the root level of your domain - e.g.
www.example.comand not a path within this domain - e.g.www.example.com/my-site.
You can configure the URL for your site through your site asset's URLs screen.
Configure OneSignal for Matrix
This section of the tutorial guides you through the process of how to configure OneSignal for Matrix.
Set up a OneSignal account
If you haven't already created a OneSignal account, visit the OneSignal web site and click Sign Up to begin this process.
For more information about OneSignal's pricing plans, consult their pricing page. Note also OneSignal's Privacy Policy and Terms of Use, as well as their documentation.
Add your Matrix site as an app to OneSignal
- Log in to OneSignal.
- On the All Applications page, click ADD APP.
- In the Add a New App dialog box, specify a meaningful name (e.g. the name of your Matrix site) and click ADD APP on the dialog box.
- On the Edit App dialog box, click Web Push (for Select Platform).
- On the Configure Web Push page, ensure Typical Site is selected.
- In the Site Setup section (further down), specify the following for these fields:
- SITE NAME - the name of your Matrix site.
- SITE URL - the URL of your Matrix site.
- In the Permission Prompt Setup section, click ADD A PROMPT, and in the Permission Prompt Editor dialog box, choose a PROMPT TYPE and click SAVE.
- ( Optional ) In the Welcome Notification section further down, specify a TITLE and MESSAGE for your initial welcome message.
- ( Optional ) There are several other options which you may wish to configure on the Configure Web Push page. Read more about these options in OneSignal's documentation.
- Click SAVE at the end of the page and keep open the resulting Configure Web Push page (with either Upload Files or Add Code to Site at the top).
If your Matrix site is secured with SSL (and is accessible through HTTPS), then OneSignal prompts you to download its OneSignal Web SDK HTTPS Integration Files (from the top Uploade Files section) as a package, which you should do.
Configure your Matrix site for OneSignal
- Ensure you are logged in to your Matrix site in admin mode and have admin permissions to your site.
- If your Matrix site is to use HTTPS (and OneSignal prompted you to download its OneSignal Web SDK HTTPS Integration Files as a package), then:
- Extract these files, which should be:
manifest.jsonOneSignalSDKUpdaterWorker.jsOneSignalSDKWorker.js
- Upload each of these files to the root level of your Matrix site. You can do this by adding each file as a new file asset from the root node of your Matrix site (each with a TYPE_2 link type).
- For each of these new file assets, access its details screen and set its Allow Unrestricted Access setting to Yes.
- Extract these files, which should be:
- Edit the contents of your Matrix site's <head> asset. If you have difficulty locating this asset, it is usually located within the Configuration > Design Assets > Design Nesters folder of your site's asset tree.
- Copy the Add Code to Site content on OneSignal's Configure Web Push page (above) and paste this content into an appropriate area of your Matrix site's <head> asset. The content of this snippet should look similar to:
<link rel="manifest" href="/manifest.json" />
<script src="https://cdn.onesignal.com/sdks/OneSignalSDK.js" async=""></script>
<script>
  var OneSignal = window.OneSignal || [];
  OneSignal.push(function() {
    OneSignal.init({
      appId: "1a2b3c4d-5e6f-7g8h-9i0j-1k2l3m4n5o6p",
    });
  });
</script>
If your Matrix site is not configured to use HTTPS, then the
<link ... />element containingmanifest.jsonwill not be present in the OneSignal code snippet. - If your Matrix site is configured to use HTTPS, modify the
href="/manifest.json"attribute's value to use the asset ID value for themanifest.jsonfile you uploaded to your Matrix site (above). When modifying this value, it should be formatted likehref="./?external-uuid=b09f6dfa-4b53-44fb-b4a7-33bff3c6a085", where 12345 is the asset ID value.The asset ID value can be found on the asset's details screen.
- Click Save at the lower right to save changes to the <head> asset.
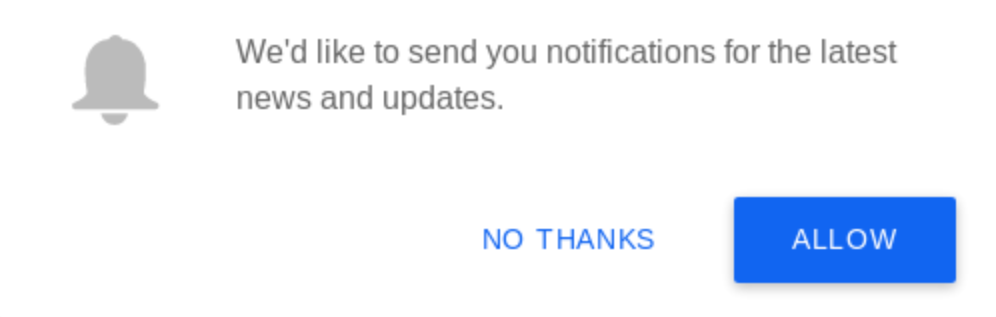
- Visit your Matrix site's home page (refreshing it if necessary) and follow the prompts to allow you to accept and subscribe to notifications from your Matrix site (originating from OneSignal).
Confirm Matrix and OneSignal are correctly configured
Check users in OneSignal
- Ensure you are logged in to OneSignal and have accessed your Matrix site app dashboard.
- Click USERS at the top and then the All Users tab to the right.
At this point, you should see a list of users who have subscribed to your notifications (i.e. just yourself from your Matrix site so far).
Send a test push notification from OneSignal
Test that push notifications from OneSignal actually work.
- From the Matrix site app dashboard in OneSignal, click MESSAGES at the top and then NEW PUSH on the Messages page.
- On the New Message page, ensure Audience is set to Send to Subscribed Users.
- In the Message section (further down), enter a custom TITLE and MESSAGE for your test push notification.
- Click CONFIRM at the end of the page.
- Click SEND MESSAGE on the Confirm Before Sending message box.
View the message from your Matrix site's home page.
Set up a push notification from an event-based trigger in Matrix
Create an event-based trigger in Matrix that uses OneSignal’s web API to send REST calls, which in turn triggers a web push notification to any (or a segmented group) of subscribers.
In this example, all OneSignal notification subscribers are notified every time a page goes live on your Matrix site.
For this part of the tutorial:
- Your Matrix account type must be system administrator and your user account located within the System Management > System Administrators user group, in order to build the required trigger for this setup.
- Your Matrix site needs to be secured with SSL.
Obtain your OneSignal web API keys
- Ensure you are logged in to OneSignal and have accessed your Matrix site app dashboard.
- Click SETTINGS at the top and then the Keys & IDs tab to the right.
- Copy the ONESIGNAL APP ID and REST API KEY values and save them so that they can be copied and pasted later.
Create an event-based trigger in Matrix
- Ensure you are logged in to your Matrix site in admin mode as a user with the system administrator account type.
- Add a new trigger asset through System Management > Trigger Manager.
- On the Create a new Trigger page, specify a Name value of "When a page goes live, send a push notification through OneSignal".
- In the Events section, select the After Status Changed checkbox.
- In the Conditions section, add the following conditions and click Save at the lower right:
- Asset Status
- Asset is of type
- Tree Location
- Choose the following values for these conditions:
- Asset Status - Asset has the current status of: Live
- Asset is of type - Match any one of these types: Page (select the Inherit checkbox)
- Tree Location - (select the site or part of the site where you want pages going live to trigger the notification).
- In the Actions section, choose Call REST resource and click Save at the lower right:
- In the Call REST resource section, set the following field values:
- Ignore Permissions - select this checkbox.
- METHOD - choose POST.
- URL(S) - specify
https://onesignal.com/api/v1/notifications. - AUTHENTICATION TYPE - ensure this is set to None.
- REQUEST HEADERS - specify the following in different fields, ensuring you replace the
<REST-API-KEY>with the REST API KEY value you saved above:Content-Type: application/json; charset=utf-8Authorization: Basic <REST-API-KEY>
- REQUEST BODY - specify the following in this text field, ensuring you replace the
<ONESIGNAL-APP-ID>with the ONESIGNAL APP ID value you saved above:{ "app_id": "<ONESIGNAL-APP-ID>", "included_segments": "Active Users", "contents": {"en": "%asset_url%"}, "headings": {"en": "New Page %asset_name% went live."}, "web_url": "%asset_url%" }
- At the top of the page, change the Status of the trigger to Enabled, which makes the trigger live.
Read more about how to configure additional elements of the request body in OneSignal's REST API documentation.
Test your event-based trigger
- Ensure you are logged in to your Matrix site in admin mode and have admin permissions to your site.
- Access the details screen of a page which is currently not live and set its status to Live.
If your trigger was successfully configured, you'll receive a browser notification indicating that the new page went live.