Asset Creation Wizard
Last Updated: 15 Apr 2017
The Asset Creation Wizard allows you to create new assets. By default, the following asset types can be created:
- Pages:
- Standard Page
- News Item
- Custom Form
- Events:
- Single Calendar Event
- Recurring Calendar Event
- Files:
- Bulk Upload Files
- Image
- Word Doc
- Excel Doc
- PowerPoint Doc
- Rich Text Format File
- MP3 File
- FLV Movie
- Generic Movie
- Generic File
- Other:
- Folder
- Redirect Page
- Link
- Data Record
You can customise the list of available asset types for creation by editing the Edit+ configuration file.
To open the Asset Creation Wizard, click on the Create New Asset button, located on the left side of the toolbar.
Asset Type Menu
When you first open the Asset Creation Wizard, you will be presented with the Asset Type Menu. From here, you can select which asset type you want to create.
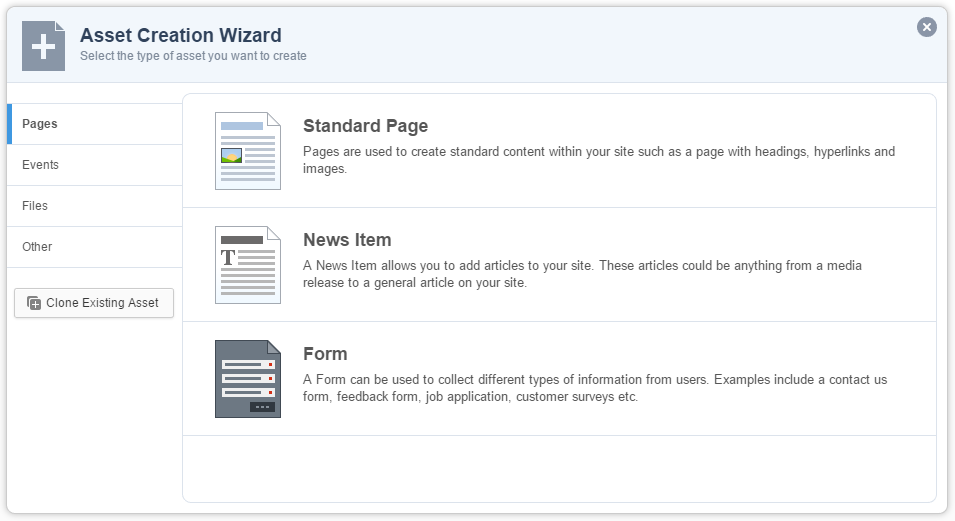
There are two main sections - the Categories section, on the left, and the Wizards section, on the right. The Categories section lists the categories of different asset types that can be created. The Wizard section displays the different asset types that can be created in the selected category.
Click on the asset type you wish to create. This will load the creation screen for that asset type.
A Clone Existing Asset button allows you to clone n existing asset within your system. For more information, refer to the Cloning an Asset section in this chapter.
The Create Screen
The Create Wizard screen allows you to input the asset information for the asset(s) to be created.
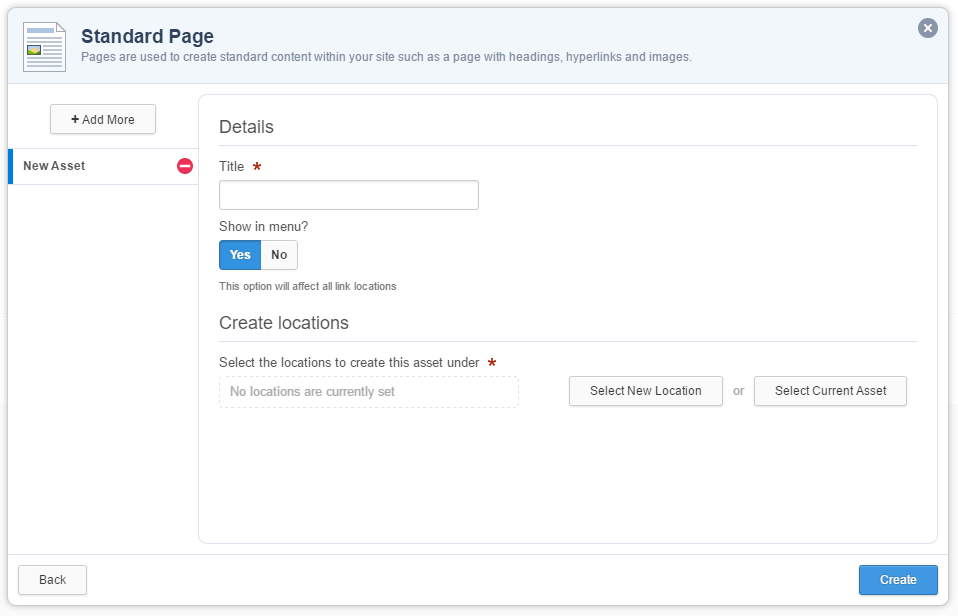
On the left side of this screen is the list of assets that are being created. Initially, only one new asset will be listed in this section. Clicking the Add More button will add a new asset to the list, allowing you to create multiple assets of the selected asset type in one go.
On the right side of the Create Wizard screen are the asset Details fields, allowing you to configure the asset(s) being created. Required fields in this section will be marked with a red star icon.
Once you have completed all the required fields, clicking the Create button will start the creation process.
If you are creating multiple assets, all required fields must be completed for each asset before can be created.
Details
The fields in this section will vary depending on the asset type being created.
For example, if you are creating an image asset, this section will also have fields for uploading a file and entering alt text and a caption. Or when you are creating an event asset, it will let you enter the dates for the events.
Create Locations
This section allows you to select where to create the asset in your Site. You can select one of more locations from the Asset Finder and/or choose to specify the currently viewed asset as the location.
To remove an asset from the list of selected asset locations, click the remove asset icon.
Completed Screen
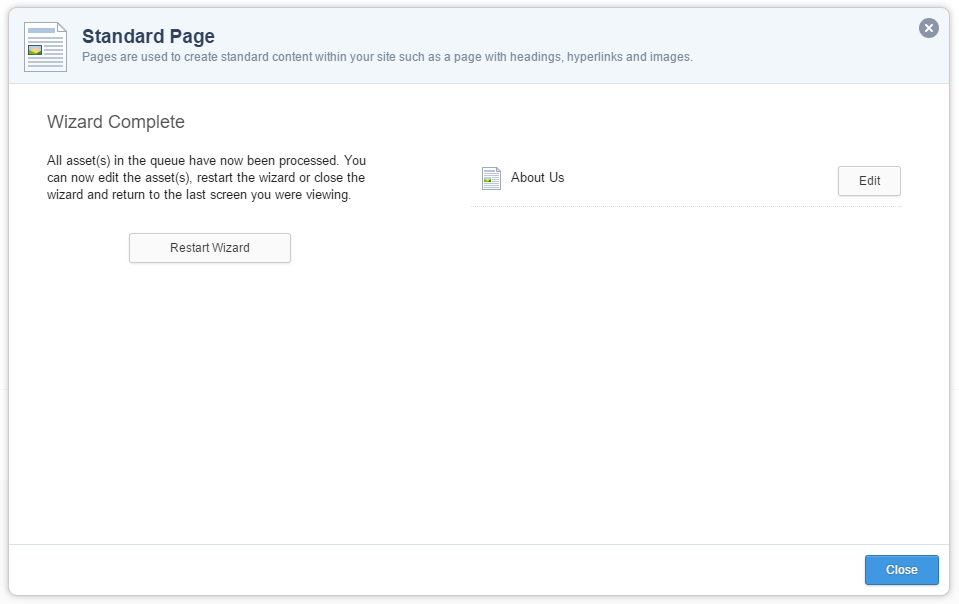
Once the creation process has completed, the Wizard will give you some options for what to do next including:
- Restart the Wizard to create more assets.
- Edit the newly created asset, which will redirect you to the editing URL of that asset.
- Close the Wizard.
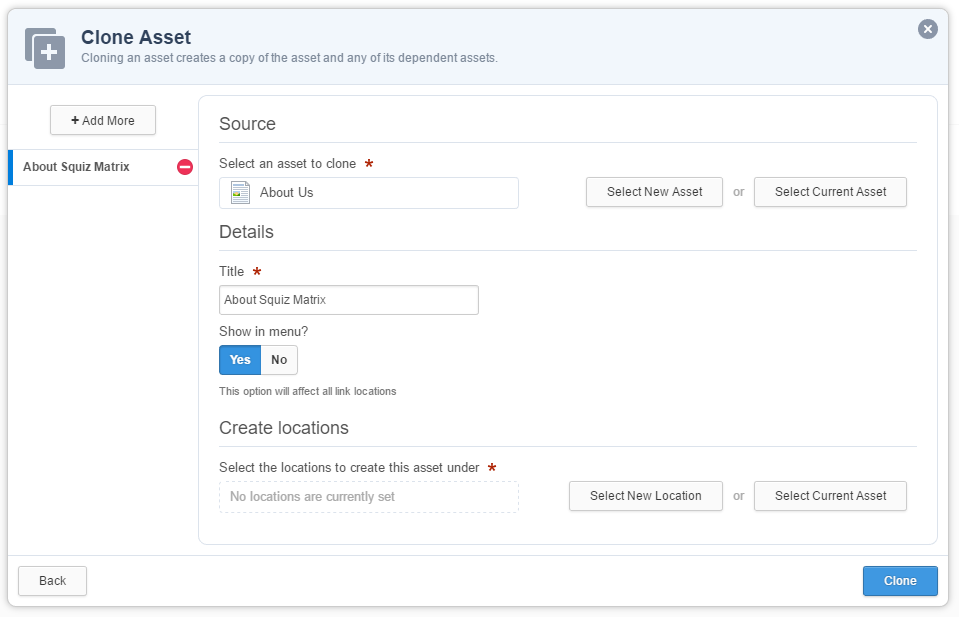
Cloning an Asset
Cloning an asset creates a copy of the asset including all of its attributes and metadata. For more information on asset cloning, refer to the Cloning an Asset chapter in the Concepts manual.
To clone an existing asset, click the Clone Existing Asset button, below the Categories section of the Asset Creation Wizard.
The Clone Asset settings will be displayed, allowing you to specify which asset to clone and where in your system you want to clone it to.