Structured Root Selector
Last Updated: 17 Dec 2015
The Structured Root Selector is a list where the user can change the root node of the Asset Listing page. For example, if you have an articles list in your Site, you can show all of the articles by default and then allow the user to choose a topic from a list. When they select that topic, only the articles for that topic are shown.
Bookmarks to the headings on this page:
Example of Setting Up a Structured Root Selector
To see how to set up a structured root selector, please consider the following example.
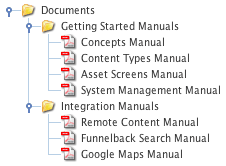
PDF Files in the Documents Folder
Within the Asset Map, the manuals have been created under a Getting Started Folder or a Integration Folder. Both of these Folders have been created under the Documents Folder, as shown in the figure to the right.
Because the files are stored in this structure we can create an Asset Listing to show all PDF Files under the Documents Folder. At the top of the page we can add a list where the user can choose to view only the Getting Started manuals or the Integration manuals. In other words they will be able to change the Root Node of the Asset Listing to be either the Getting Started Folder or the Integration Folder. When they select a value from the list, the page will be updated to only show the assets stored under that Folder.
To set up this Asset Listing, follow the steps outlined below:
- Create an Asset Listing page called Manuals under your Site.
- Right click on the Asset Listing page in the Asset Map and select Details. Change the following fields on this screen:
- Asset Types to List: select PDF Files
- Root Nodes: select the Documents Folder
- Dynamic Parameters: select Replacement root nodes for the listing in the first list and GET Variable Name in the second list.
-
Structured Root Selector Options:
- Root Node: select the Documents Folder.
- Asset Types: select Folder from the list.
- Click Commit.
- In the Dynamic Parameters section, add the name of the root node selector in the GET Variable Name field, as shown in the figure below.

The Dynamic Parameters section - Click Commit.
-
Right click on the Asset Listing page in the Asset Map and select Display Formats. In the Customised Asset Type Formats section, select PDF File from the list and click Commit. A PDF FileFormat Bodycopy will be created under the Type Formats Folder in the Asset Map, as shown in the figure to the right.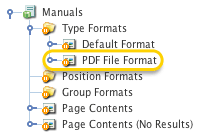
The PDF File Format Bodycopy - Right click on the PDF File Format Bodycopy in the Asset Map and select Edit Contents.
- Format what to show for each asset in the list. An example of what you can do is shown in the figure below.

The WYSIWYG Editor on the PDF File Format Bodycopy - Right click on the Page Contents Bodycopy in the Asset Map and select Edit Contents.
- Format what to show for the page. Also add the keyword replacements Structured Root Node Selector and Submit Button. An example of what you can do is shown in the figure below.
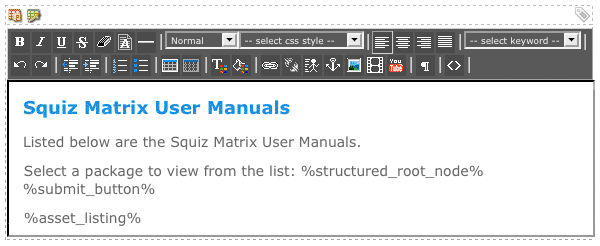
The WYSIWYG Editor on the Page Contents Bodycopy
When you preview the Manuals page, it will show all PDF Files that are located under the Documents Folder. A list will also appear at the top of the page, as shown in the figure below.
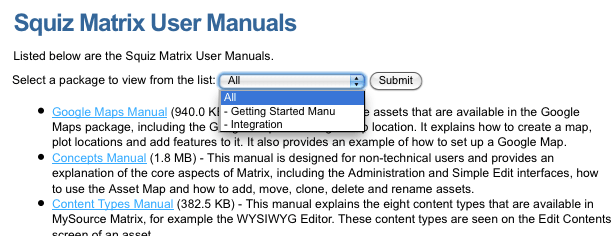
A preview of the selector list on the Asset Listing page
The user can select to show all manuals, only the Getting Started manuals or only the Integration manuals. When they select a value and click Submit, the list will be updated to only show the assets under that root node. For example, if you select Integration, the page will be updated to show the PDF Files under the Integration Folder, as shown in the figure below.
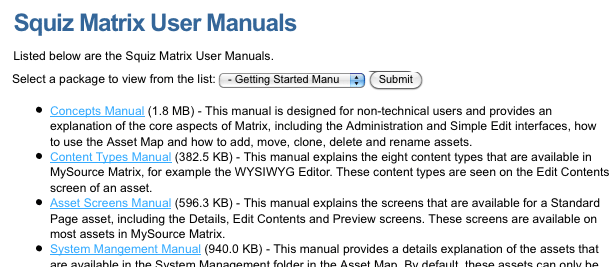
A preview of the Asset Listing page displaying the Getting Started Manuals
