
How To Set Up a Git File Bridge
Intermediate
26 Mar 2018 For version 5.3.0.0
This guide will explain how to set up a Git File Bridge and connect it to a repository. It will also demonstrate how to set up a Webhook to make Matrix fetch updates from the repository automatically with compatible repository providers.
This example assumes you already have an existing repository to work with and that you have admin access to it.
Bookmarks to the headings on this page:
Creating the Git File Bridge Asset
The first thing we'll do is to create the Git File Bridge asset for Matrix to use as the integration connection to the repository. This asset will need to be created somewhere with a publicly accessible URL applied. It is recommended to place this asset in the same area as your other design based assets, such as a dedicated design Site asset.
- Create a new Git File Bridge asset by choosing Filesystem from the asset creation menu, and then clicking on Git File Bridge.
- Enter a name for the asset, in our example we'll go with "Manuals Design Files", and Save.
- Acquire the locks and make the asset Live straight away.
- If it doesn't already, you'll also need to grant public read permissions this asset on the Permissions screen.
You should now have a Git File Bridge asset created and ready to be connected to your repository.
Configuring the Repository
Using HTTPS requires you to store username and password values in clear text in the Matrix database. Try to use SSH, avoid using personal username and passwords when SSH is not possible.
The SSH Public Key for the Matrix install is available on the External Tools Configuration screen, generally you only need the Public Key:
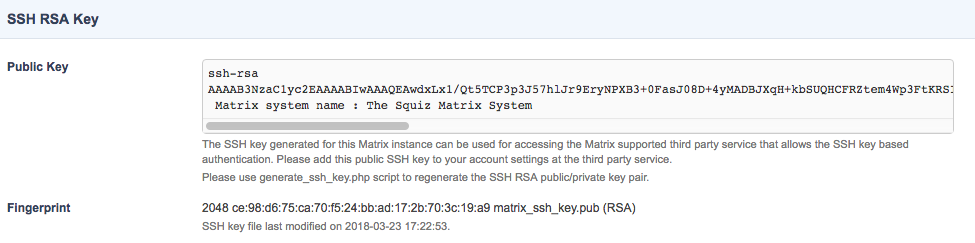
HTTPS is only recommended for use with publicly available repositories.
We recommend using SSH with deploy keys when possible as this is simplest to set up, however GitHub only allows a deploy key to be used on one repository and Matrix currently only has one SSH key per install so this will not always be practical.
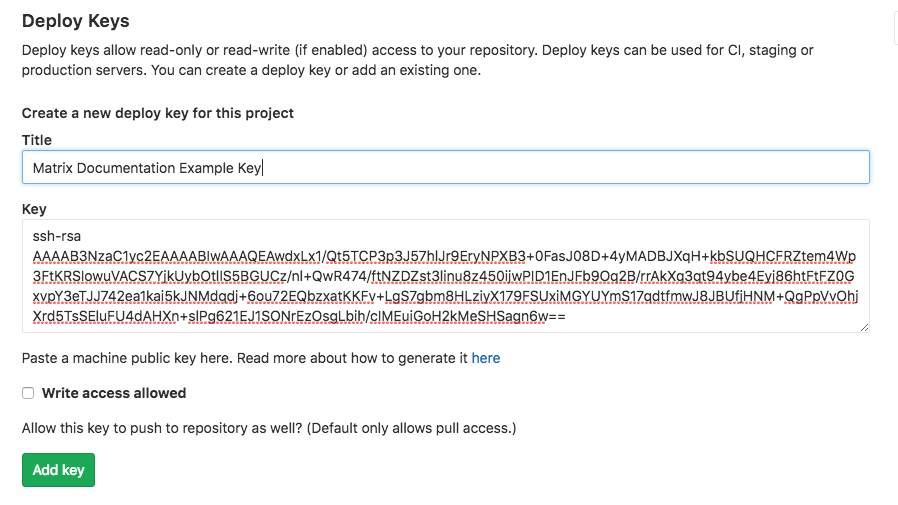
Deploy keys can be added by a GitHub account with suitable access to the repository, get the SSH Public Key using the instructions above and then added it by following the instructions at https://developer.github.com/v3/guides/managing-deploy-keys/#deploy-keys.
GitHub allows machine users, so if you are unable to use deploy keys, we recommend setting one up and adding the Matrix SSH Public Key to the users keys.
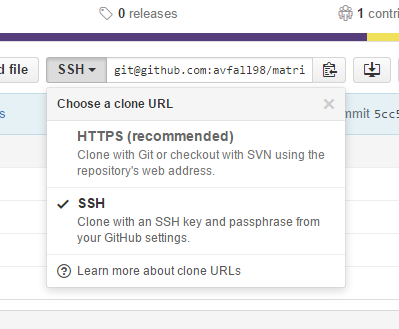
- Once either the deploy key or machine user is configured, go to the main page of your GitHub repository and locate the Clone URL section.
- Copy either the SSH or HTTPS version into your clipboard. In our example we'll use the SSH version.
GitLab allows deploy keys to be configured by anyone with appropriate access to the repository on the $repo/settings/repository URL (substitute $repo with the top level URL of your repo, e.g https://gitlab.com/group/repo).
If the key has already been added to GitLab, it will complain:

This does not mean it can not be used, but you must instead find it in the list of existing IDs and use the Enable button:

It's possible to use the fingerprint on the Matrix External Tools Configuration screen to search for the key in GitLab.
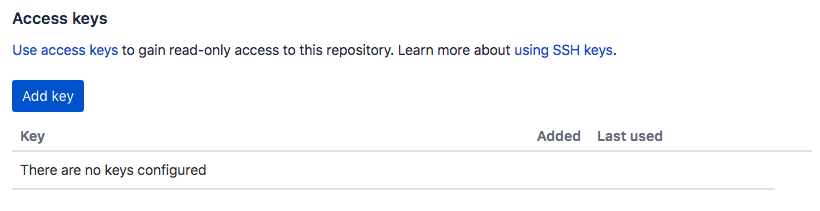
Bitbucket allows "Access keys" to be configured per repository by any user with suitable access to the repository.
- Navigate to
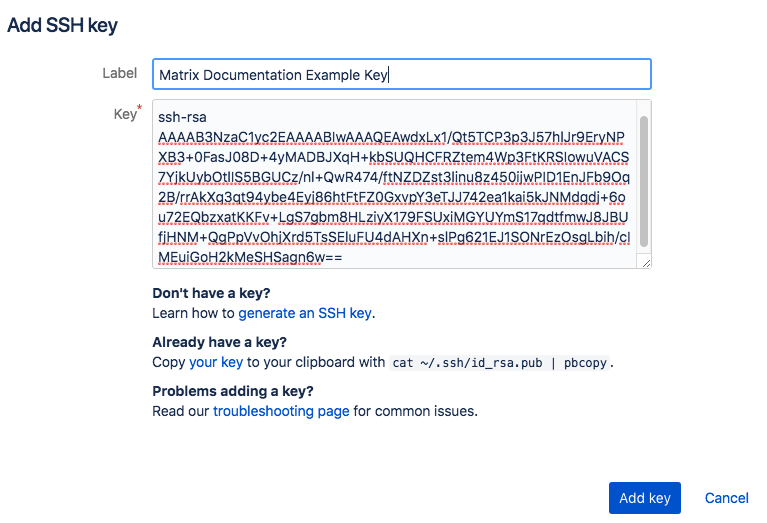
$repo/admin/access-keys/(where$repois replaced with the top level URL of your repository e.ghttps://bitbucket.org/user/repo). - Click Add key:
- Enter the Matrix SSH Public Key and click Add key again:
Cloning the Repository to Matrix
Now let's configure the Git File Bridge asset in Matrix to talk to our Git Repo.
- Once the URL is in your clipboard, go to the Details screen of your Git File Bridge asset and paste it into the Git URL field. If you are using a HTTPS URL that requires authentication, you will need to enter a username and password as well.
- Save the screen.
- At this point there should be a Clone Repo button available next to the Git URL field. Click on this button to tell Matrix to clone the files from the repository over to your Matrix server.

- A loading icon will appear while the repository is cloned. Once complete, the screen will refresh and a new section called Current Repository will be available showing you the information about the cloned repository.
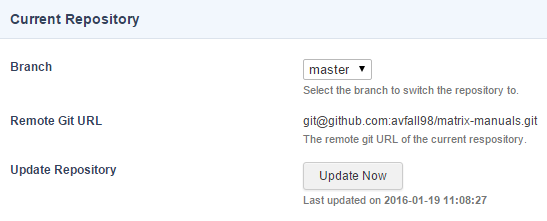
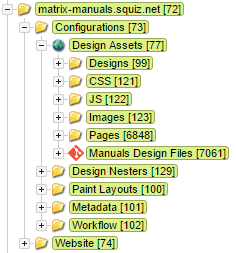
We'll leave the Branch setting as the "master" branch for our example. If you now expand the Git File Bridge asset in the Asset Tree you should also be able to see shadow assets of the files that have been cloned over to the Matrix server.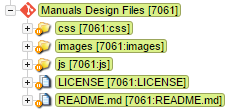
We have now successfully configured the Git File Bridge and cloned the files from the repository. Next we'll create a Standard Page asset and reference some of our Git files into it.
Referencing Files
In this step, we'll reference a CSS and JS file from our Git File Bridge in the contents of Standard Page asset.
- Create a Standard Page asset and set the default Content Container's Presentation setting to "Raw" and the Content Type setting to "Raw HTML" and Commit the screen.
- Locate the files you want to link to within your Git File Bridge asset so that you can see the full relative path and file names of the files. In our example we'll be using the "globals.css" and "globals.js" files located under the "css and "js" folders respectively.
- Next, we'll reference these files into a
<link>and<script>tag within the contents of our Standard Page, using the Asset ID of the Git File Bridge followed by the relative path to the files themselves.
- If we preview this Standard Page on the front end, we should see the references to the files written as absolute URLs to their location within the __data directory on the Matrix server. In our example, this would translate to the following HTML code:
<link rel="stylesheet" href="https://matrix.squiz.net/__data/assets/git_bridge/0014/7061/css/global.css"> <!--global.css-->
<script src="https://matrix.squiz.net/__data/assets/git_bridge/0014/7061/js/global.js"></script> <!--global.js-->
We have now completed the basic set up of the Git File Bridge asset and referenced some of its files within a Standard Page.
Every time we make a change to the files in the repository, we need to go to the Current Repository section on the Details screen of the Git FIle Bridge asset and click on the Update Now button to see the changes reflected on the Matrix server.
Ideally we'd want this to happen automatically, so in order to do so we need to configure a Webhook.
Creating a Webhook
Webhooks allow you to set up automatic updates to your Git File Bridge whenever a certain event occurs on the remote Git repository.
The first thing we need to do is to add a secret key to our Git File Bridge that will be used to authorise any webhook requests made from the Git repository.
- Go to the Details screen of the Git File Bridge and find the Secret Key field. Enter a custom key in here. This can be any random string you want but make sure it's not something like your personal password.

That's all we need from the Matrix side. The rest is all done in the Git repository.
Webhooks will only work if the Git File Bridge is live and publicly accessible.
Configuring the webhook on the repository provider will be different depending on how the repository is hosted.
Configuring the Webhook in GitHub
Now that we have our secret key added in Matrix, we need to create the webhook in GitHub so that it calls our Matrix Git File Bridge every time an event occurs in the repository.
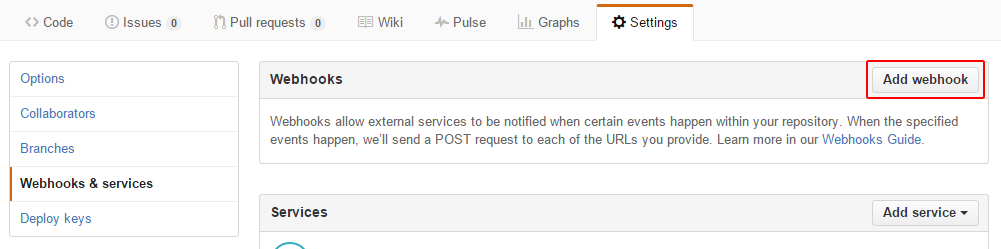
- Start by going to the Settings tab of the main GitHub repository navigation.
- Click on the Webhooks & services link in the left side navigation.
- Click on the Add webhook button to bring the interface up for adding a webhook.
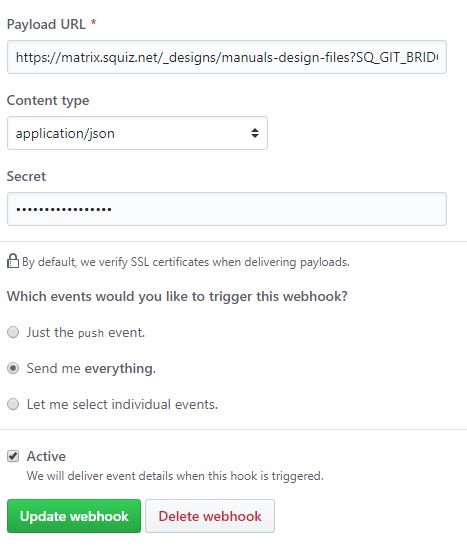
- In the Payload URL field, simply enter the URL of the Git File Bridge asset in Matrix, followed by a special query string that tells Matrix do to a Git Pull.
https://matrix.squiz.net/_designs/manuals-design-files?SQ_GIT_BRIDGE_ACTION=pull
- Set the Content type setting to application/json.
- In the Secret field, enter the Secret Key we set on the Git File Bridge in Matrix.
- If you are using a HTTPS URL in the Payload URL field, GitHub will by default enable SSL verification which is recommended for security purposes. If you are using an SSL certificate that can't be verified, such as a self-signed one, you might need to disable this in order for the webhook to work properly.
- In the Events section you can choose which particular events you want to trigger the webhook. For our example we'll select Send me everything to that it triggers for any event.
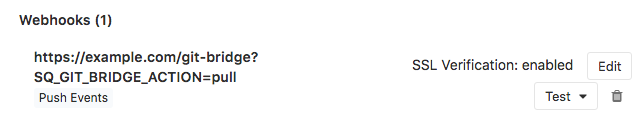
- Enable the Active setting and click on the Add webhook to create it. Your webhook should now look something like this:
- If created successfully, GitHub will alert you that it has created the webhook and sent a ping payload to test it out. You can also confirm that the test payload was successful by clicking on the webhook to edit it and scrolling down to the Recent Deliveries section. There should now be at least 1 delivery with a green tick indicating that it was successful.

You can also click on this delivery to view more details such as Request and Response data. - To confirm that the event triggered an update in our Git File Bridge, we can look at the last updated date of the Update Repository field on the Details screen to see if it matches our delivery timestamp in GitHub.

We have now successfully created a webhook that triggers an update to the Git File Bridge in our Matrix system every time an event occurs within the Git repository.
Configuring the Webhook in GitLab
Support for GitLab webhooks was added to Matrix in version 5.4.4.0.
Now that we have our secret key added in Matrix, we need to create the webhook in GitLab so that it calls our Matrix Git File Bridge every time an event occurs in the repository.
- Start by going to the Settings menu in the main GitLab repository navigation.
- Click on the Webhooks link.
Alternatively navigate to $repo/hooks (where "$repo" should be replaced with the top level URL of that repository e.g "https://gitlab.com/group/repo"). - In the URL field, enter the URL of the Git File Bridge asset in Matrix, followed by a special query string that tells Matrix do to a Git Pull.
- You can now easily test this integration by pressing the Edit button on the webhook:
- Then under Test, select Push events:
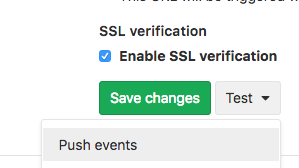
- If everything worked correctly, it will say 200:

https://matrix.squiz.net/_designs/manuals-design-files?SQ_GIT_BRIDGE_ACTION=pull
We have now successfully created a webhook that triggers an update to the Git File Bridge in our Matrix system every time an event occurs within the Git repository.