How To Integrate With Google Analytics Using REST & OAuth 2.0
Advanced
10 Jan 2017 For version 5.3.0.0
This tutorial will take you through an example of integrating with the Google Analytics (GA) API V3 using a Matrix REST Resource JavaScript asset.
It will also show you how to use an OAuth 2.0 authentication token in order to make authenticated calls to the GA API.
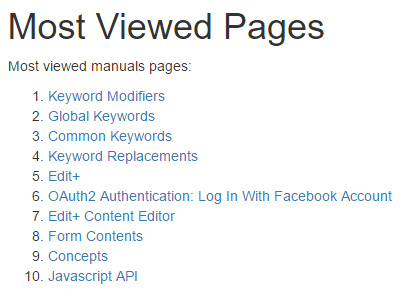
In our example, we'll simply just get the top 10 most viewed pages of our site from the last 7 days and then print it as a list on the front-end.
This tutorial assumes you understand the basic concepts of the OAuth 2 Token and the REST Resource JavaScript asset and have basic experience using Google Analytics and the Google API Developer Console. It is also a good idea to be familiar with the overview of the Core Reporting API documentation.
Setting Up The Authentication
The first thing we need to do is to set up an authentication token so that Matrix can make API calls to the GA API.
Creating a Client ID and Secret
We'll start with configuring our API Developer Console in Google which will give us some authentication details to put into our Token asset in Matrix.
This guide assumes you already have a project set up in the Developer Console and that the account you are logged in with in Google has at least read access to the GA View ID you want to get data from.
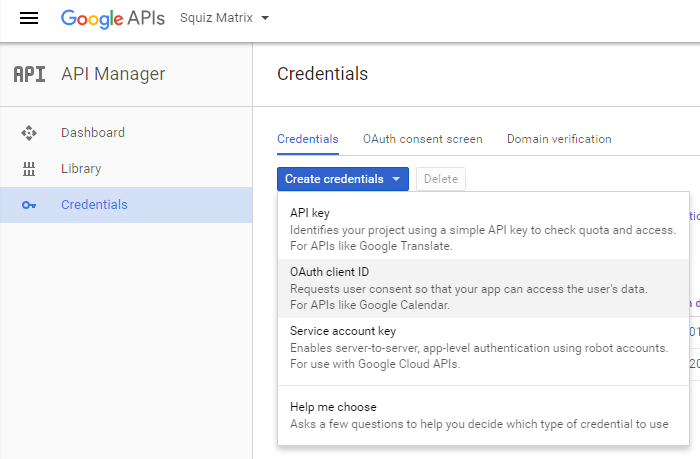
- Login to your Developer Console and go to the Credentials screen at https://console.developers.google.com/apis/credentials.
- We need to create a new Client ID, so click on Create credentials and then OAuth client id.
- On the next Create client ID screen, choose Web application and enter a suitable name. In our example we'll use "Matrix Website".
- On the same screen, you need to enter URLs that match your Matrix install and the OAuth 2 asset. So at this stage, switch back to your Matrix Admin interface and create your OAuth 2 Token asset somewhere where it will get an URL applied. In our example we'll give it a name of Google Analytics Token.
- Before we configure anything for it, we want to finish off our setup in the Developer Console, so all we'll need for now is the URL that has been applied to this asset. Go to the Web Paths screen and copy the URL you will be using to authenticate with.
- Now switch back to the Developer Console screen and populate the following fields (these URLs will obviously be different for your own implementation):
- Authorised JavaScript origins: This will be the domain of where your Matrix installation is hosted on, for example: https://matrix.squiz.net
- Authorised redirect URIs: This will be the URL you copied from the Web Paths screen of the OAuth2 asset. In our example we'll be using: https://matrix.squiz.net/configs/google-analytics-token
- Your Create client ID screen should look similar to this:

- Click Create to finish the setup. You should now have a new Client ID with an associated Client Secret. Keep these handy as you will need to copy and paste them into your token asset.
Configuring the OAuth2 Token
Now that we have our Client ID and Secret from the Google Developer Console, we can switch back to the Matrix Admin interface.
- Head back to the OAuth2 Token asset created previosuly and view the Details screen.
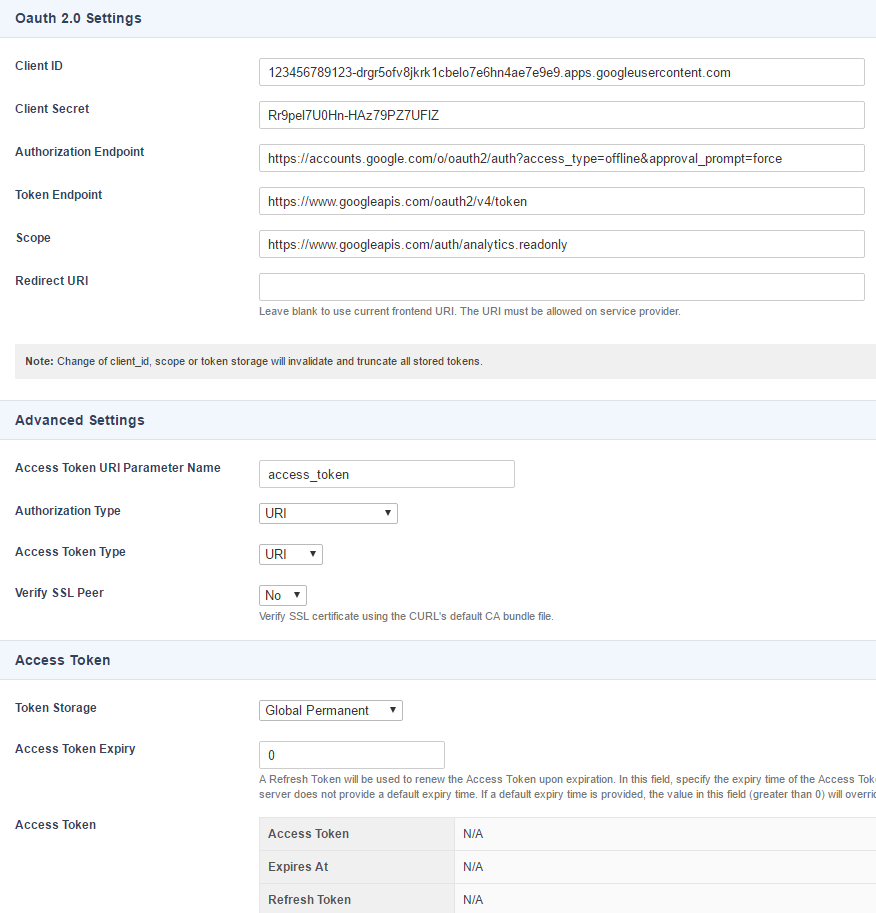
- Find the Oauth 2.0 Settings section and enter the following details in:
- Client ID: Enter your Client ID created in the Google Developer Console.
- Client Secret: Enter your Client Secret.
- Authorization Endpoint: Set this value to: https://accounts.google.com/o/oauth2/auth?access_type=offline&approval_prompt=force
- The access_type=offline part allows us to get a refresh token from the GA API so that we can setup a permanent token in Matrix that automatically gets refreshed when the access token expires.
- The approval_prompt=force part is needed if you ever need to manually re-authenticate to get a new access token as it will tell Google to always show an approval prompt before sending a new access and refresh token.
- Token Endpoint: Set this value to: https://www.googleapis.com/oauth2/v4/token
- Scope: Set this value to: https://www.googleapis.com/auth/analytics.readonly
- Scroll down to the Access Token section and set the Token Storage to Global Permanent. This will tell Matrix to store the token globally for all users and not per user session.
- Save the screen and your Details screen should now look similar to this:
- Make sure you retain the locks on this asset and view the URL of it in a new window or tab. This needs to be exactly the same URL that you entered into the Authorised redirect URIs field of the Client ID setup. In our example this would be https://matrix.squiz.net/configs/google-analytics-token.
- The easiest way to do this is to go back to view Web Paths screen and click on the applicable URL which will open the link in a new browser tab.
- When you view this link, it will redirect you over to Google and ask you to allow access to your account's Google Analytics data as well as having offline access. Click Allow. It will then redirect you back to the token asset in Matrix.
- Go back to the Details screen of your OAuth2 Token asset and it should now have all fields populated in the Access Token field on the bottom of the screen, similar to this:
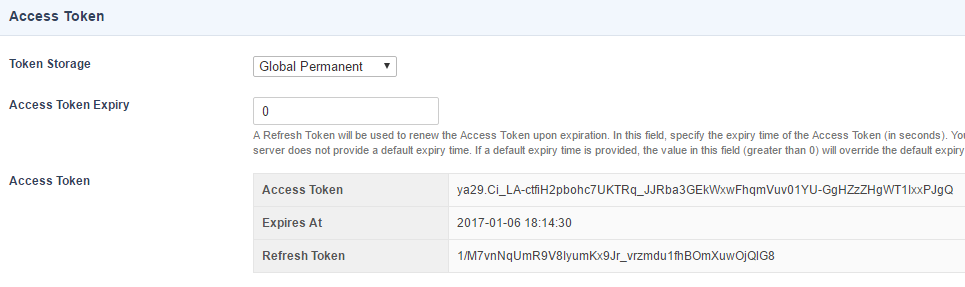
The hardest part is now done. We now have an OAuth 2.0 based access token setup that we can use to make authenticated calls to the GA API.
If you ever need to request a new token before the current one has expired, you can manually do so by viewing the URL of the token asset and append ?force=true to the end of it force request a new one.
Setting Up the REST Asset
Now that we have our access token, we can setup the integration asset that will make the API calls from Matrix to GA.
- Start by creating a new REST Resource JavaScript asset. We'll call ours Google Analytics Data.
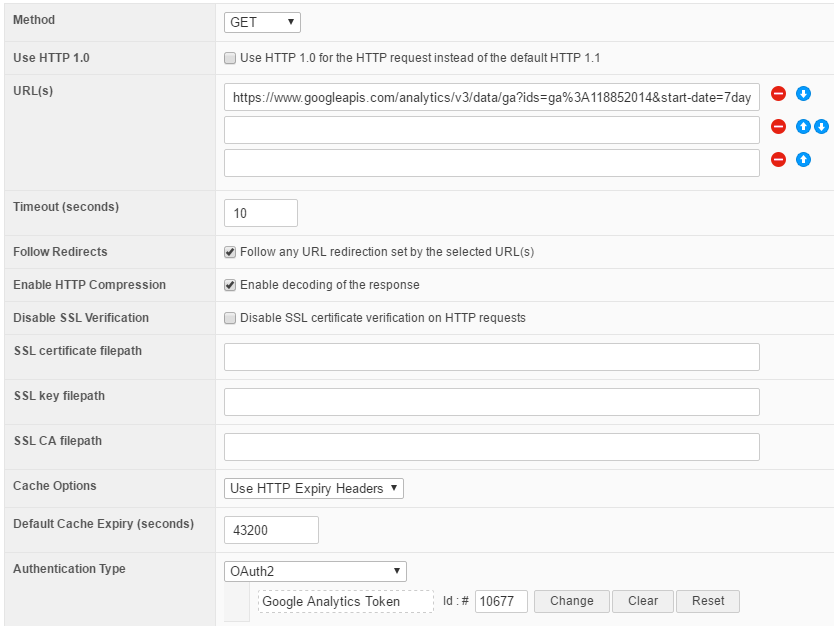
- Go to the Details screen and find the HTTP Request table and set the following values:
- URL(s): This will be the URL that will call the GA API with the relevant parameters for us to get the right data. There are many different ways you can get data from the API and Google provides a nice Query Explorer tool that lets you tweak and test the various parameters and then gives you an API Query URL for you to copy and paste into your own application. We will use the following URL:
https://www.googleapis.com/analytics/v3/data/ga?ids=ga%3A118852014
&start-date=7daysAgo
&end-date=yesterday
&metrics=ga%3Apageviews
&dimensions=ga%3ApagePath%2Cga%3ApageTitle
&sort=-ga%3Apageviews
&max-results=10
You will need to replace the highlighted part with your own GA View ID that you want to get data from.
The URL is based on the following parameters seen in the Query Explorer:
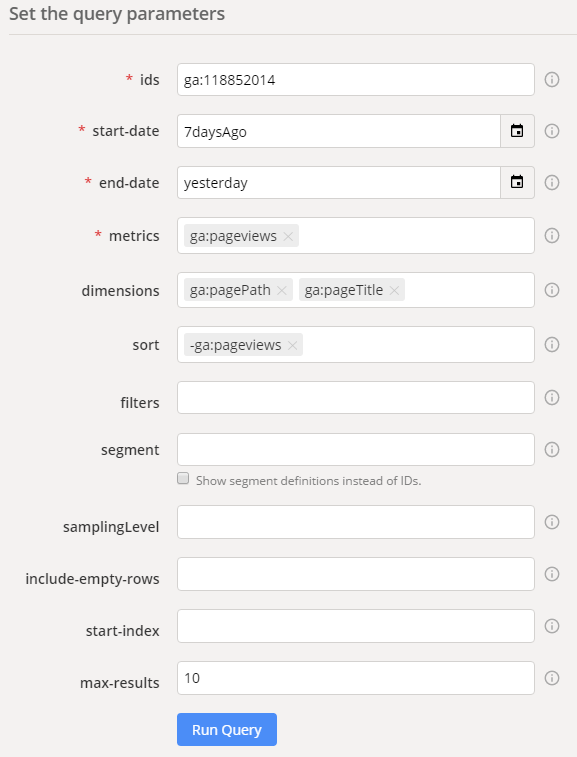
In summary, this will give us:- The top 10 most viewed pages,
- Including page path and page title information,
- From the last 7 days until yesterday,
- Sorted by descending number of page views.
- Cache Options: We definintely want to cache this data because we don't need it fresh from GA on every page load, so set this option to Use Default Expiry.
- Default Cache Expiry: We can set this pretty high because the data is only updated daily, so lets set it to 43200 (12 hours).
- Authentication Type: Change this to OAuth2. At this point you can Save the screen and scroll down to this field again. You will now have an asset picker available for this field. Choose the Google Analytics Token OAuth2 Token asset we created previously.
Every REST call that is made with this asset will now send the appropriate OAuth2 authentication headers along with it which will automatically include the acces token stored in our OAuth2 Token asset. - This table should now look similar to this:
- URL(s): This will be the URL that will call the GA API with the relevant parameters for us to get the right data. There are many different ways you can get data from the API and Google provides a nice Query Explorer tool that lets you tweak and test the various parameters and then gives you an API Query URL for you to copy and paste into your own application. We will use the following URL:
- Finally, scroll to the JavaScript Processing section and find the JavaScript input area. This is where we'll use some server side JS to transform the data into the right HTML output we want for the front-end.
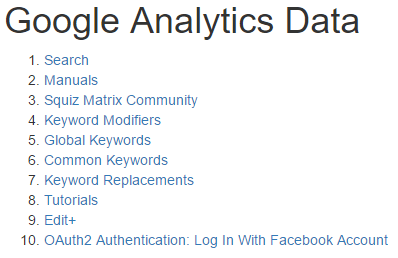
In this example, we'll just get each page returned in the data to be printed in an orered list:var data = JSON.parse(_REST.response.body); var rows = data.rows; print('<ol>'); rows.forEach(function(e, i, a){ print('<li><a href="'+ e[0] +'">'+ e[1].replace(' | Squiz Matrix Community','') +'</a></li>'); }); print('</ol>');
That finishes off the REST asset.
You should now be able to preview this asset on the front-end and see the ordered list populated with the values retrieved from GA:
Dynamic Display of Data on the Front-End
Now that we have a REST asset that can call the GA API directly and bring back data, we can make it more flexible by providing each parameter as a dynamic input.
We can then re-use this REST asset in multiple ways to display different kinds of data from GA by nesting it into other pages and passing the dynamic parameters via GET variables.
Lets see an example of this:
- First, go back to the Details screen of our REST asset and find the URL(s) field.
- We're going to add a new parameter to the URL called
filters. This will enable us to bring back top 10 pages from various sections of the site, for example top most read news stories.
We'll add a page path regex matchingfiltersparameter together with a keyword for the dynamic value to the end of the URL: - Now lets create a Standard Page asset where we'll nest the REST asset into. We'll call ours Most Viewed Pages.
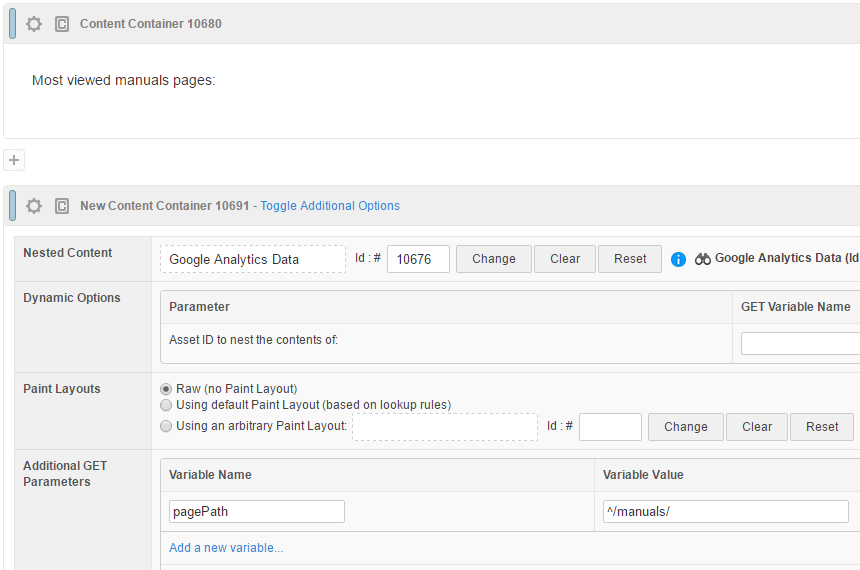
- On its Edit Contents screen, add a new Nested Content Container, and Save the screen.
- On the new Nested Container, click on click on Toggle Additional Options and configure the following options:
- Nested Content: Select the Google Analytics Data REST asset.
- Additional GET Parameters: Click on Add a new variable and add a new variable with:
- Name: pagePath
- Value: ^/manuals/
In our example we want to just retrieve the top 10 pages in the Manuals section of the site. Replace this value with any page path you want to filter on based on your website.
- Save the screen. The contents of your Standard Page should now look something like this:
https://www.googleapis.com/analytics/v3/data/ga?ids=ga%3A118852014
&start-date=7daysAgo
&end-date=yesterday
&metrics=ga%3Apageviews
&dimensions=ga%3ApagePath%2Cga%3ApageTitle
&sort=-ga%3Apageviews
&max-results=10
&filters=ga%3ApagePath%3D~%nested_get_pagePath^rawurlencode^empty:.*%
Notice how we've added a ^rawurlencode keyword modifier so that we can simply pass the value un-encoded to make it easier for us to use. We're also using the ^empty modifier to print some regex to include all data if the value is empty.
That's it. You can now preview the Standard Page on the front-end and hopefully see a similar list as before, but filtered to the page path you specified: