
How To Customise The Edit+ WYSIWYG Content Styles
Intermediate
31 Jan 2017 For version 5.3.0.0
This is a quick tutorial on how you can add your own custom CSS into the Edit+ interface in order to customise the look and feel of the WYSIWYG content.
This can make the content editing experience match the front-end design as closely as possible, so that you don't have to necessarily hit Preview in order to see what the content will look like after every save.
Customising the styles of the Edit+ interface can interfere with the native functionality of the tool and should only be done by users with intermediate CSS knowledge.
This tutorial assumes you have some basic knowledge of how Edit+ is installed on a Design.
Configuring the Design File
The example in this tutorial is based on version 5.4 of Squiz Matrix using the Edit+ Manager asset and design tag. However, the concept of nesting your custom code into Edit+ is very similar to the way you would do it in earlier versions.
The first thing we'll do is to tweak the Edit+ design tag in the Design of our site so that we can start including our custom code.
- Go to the Edit Parse File screen of your site's Design and find the Edit Plus design area which should look something like this:
<mysource_area id_name="editplus" design_area="editplus"/>
- We want to nest in the contents of a Standard Page into Edit+, so we'll add a new
nest_contentdesign tag above this line and make it print inside the Edit Plus tag, like this:<mysource_area id_name="editplus_custom" design_area="nest_content" print="no"/> <mysource_area id_name="editplus" design_area="editplus"> <mysource_print id_name="editplus_custom" /> </mysource_area> - Now create a Standard Page asset somewhere where your other configuration assets are, this will be the asset we nest in to Edit+. Let's call it, Edit+ Config.
- Make sure the Presentation and Content Type of this asset's Content Container are both set to Raw.
- For now, just add a HTML comment into the contents of this Standard Page (we'll add some more code later).
<!-- Custom Edit+ Config -->
- Finish this section off by going to the Customisation of your Design, customise the newly created editplus_custom nested content area, and select the Edit+ Config Standard Page asset as the asset to nest in.
You can now test that the contents of the Standard Page is successfully coming through to Edit+ by viewing the source code of the /_edit URL. The HTML comment we added should appear just before the closing </head> tag.

Adding Custom CSS
Now that we have our Standard Page in place, we can start adding some custom code. Specifically, we can include a link to a custom CSS file and add some styles into there.
- Create a new CSS Design File under the same location as the Standard Page we created, let's call it edit-plus-custom-styles.css. Make sure that this CSS file gets an URL so that it can be accessed on the front-end.
- Go to the Edit Contents screen of the Edit+ Config asset where we previously added our HTML comment. Add a
<link/>tag reference to the CSS asset.<!-- Custom Edit+ Config --> <!-- Custom CSS --> <link href="https://matrix.squiz.net/releases/archived-releases/5.1/5.1.13.1?v=0.1.3" rel="stylesheet"/>
- Now we can start adding some custom styles into our CSS file, which will now get loaded in Edit+. As an example for this tutorial, we'll overwrite the styling of the
blockquotetag, which by default looks like this: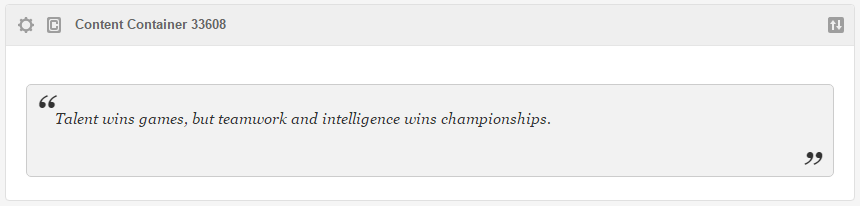
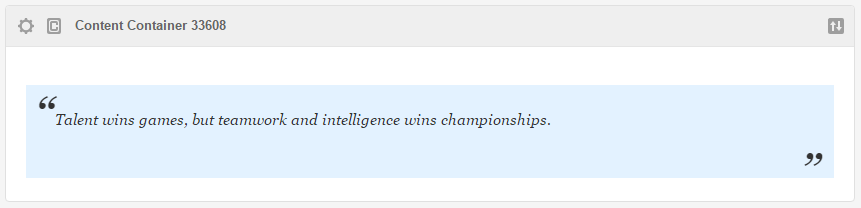
- In our CSS file, we need to prefix any overwriting styles with two parent classes using
.plus .content_type_wysiwyg.
So if we wanted to change some styles for ourblockquotetag, we'd add the styles like this:.plus .content_type_wysiwyg blockquote{ background: #e3f2ff; border-color: #e3f2ff; border-radius: 0; }Which would make our quote now look like this:
And that's it. You can now start changing other styles such as font sizes and margins for things like paragraphs and headings.
This is also a good method for including your custom classes that can be added to the WYSIWYG tool into the Edit+ editing interface.
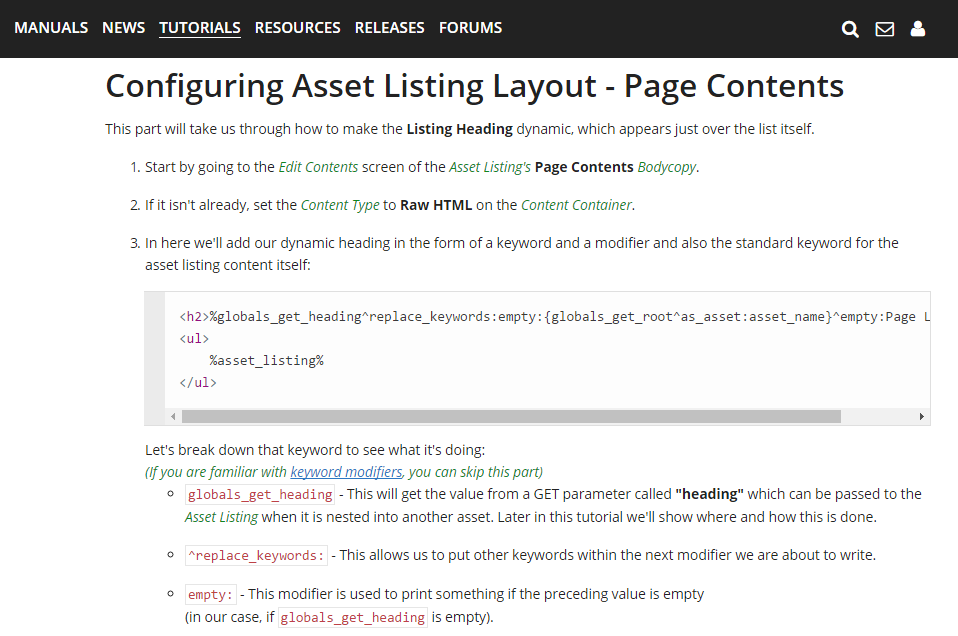
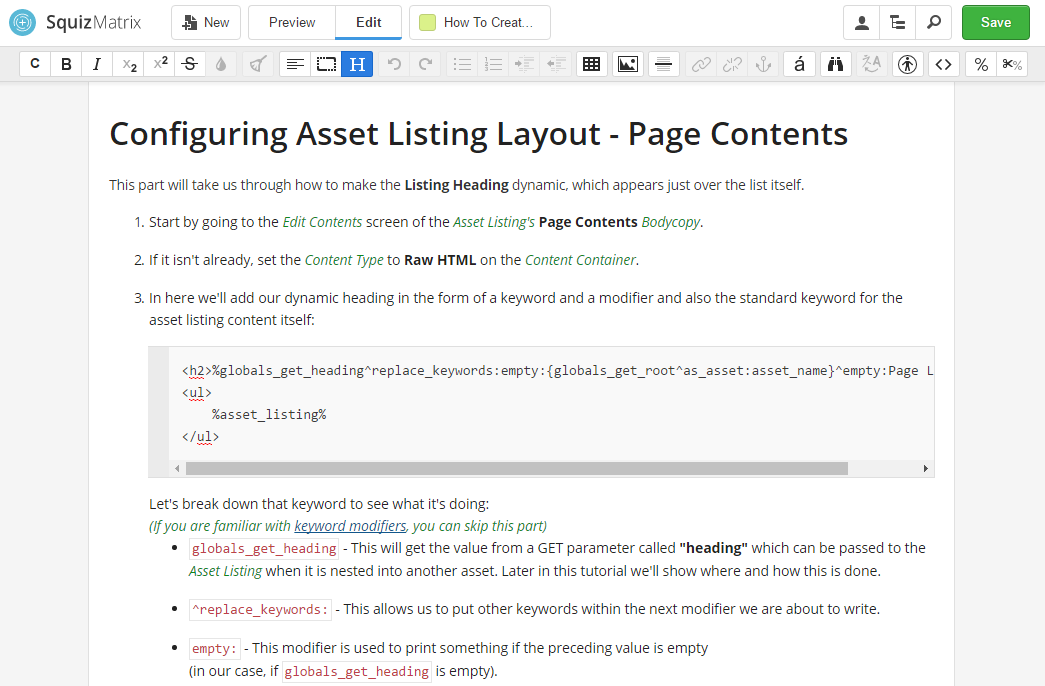
Below you can see an example of how the Edit+ interface has been customised for the Community site (matrix.squiz.net) to match the WYSIWYG content styles with the front-end content design:
Front-end:
Edit+:
Don't forget to make your assets Live and accessible to your editors. As these assets don't hold any sensitive information, you can probably make them publicly accessible so that they load as quickly as possible in Edit+.