
How To Create an ESI Based Main Menu
Intermediate
16 Feb 2018 For version 5.3.0.0
Main menus can often hold a big list of page names and links. They can also sometimes include dynamic listings, such as the latest 3 media releases posted in the News area. With dynamic menus like these, it's often tricky to clear the proxy cache site wide when elements within the menu change.
If you are running Matrix behind a caching proxy that supports ESI however, like Squiz Edge, this problem goes away. That's because you can bring in your menu using an ESI tag and have it instantly get updated on every page of your site it's used on, with a single cache clearing request.
This guide will show you a quick and easy way of creating a main menu in Matrix that is suitable for including in your design using an ESI tag.
The site design we'll be using in the example is based on the sample Project Template that you can download from the Templates area of the Matrix Community site. We'll be using a pretty basic 2-level main menu, but the concept can also be applied to custom mega menus that feature things like Asset Listings.
This tutorial assumes you have a basic understanding of how ESI works. If you haven't already, make sure you also check out the other tutorial on how to use ESI tags and Squiz Edge with Squiz Matrix.
Creating the Menu Design Asset
The first thing we'll do is to create the Design that will power our menu. We'll be using the standard way of doing this in Matrix using the Menu Design Area.
- Create a new Design asset for our menu. In our example we'll use the name, "Main Menu (ESI)".
- Go to the edit screen of the Design and just add the code for the main menu HTML markup, for example:
<mysource_area id_name="nav" design_area="menu_normal">
  <mysource_set name="show_subs" value="always" />
  <ul class="nav">
    <mysource_asset>
      <li class="nav-item dropdown">
        <a href="<mysource_print var='asset_link'/>" class="nav-link"><mysource_print var='asset_short_name'/></a>
          <mysource_sub design_area="menu_normal">
          <mysource_set name="show_subs" value="always" />
          <ul class="dropdown-menu">
            <mysource_asset>
              <li class="nav-item">
                <a href="<mysource_print var='asset_link'/>" class="nav-link"><mysource_print var='asset_short_name'/></a>
              </li>
            </mysource_asset>
          </ul>
        </mysource_sub>
      </li>
    </mysource_asset>
  </ul>
</mysource_area>
That's all we need in our Design, for now.
Applying the Design to the Site
We'll be rendering the menu based on the URL of the current site. To do that, we can apply our new Main Menu (ESI) design to our Site asset using a custom design code.
- Go to the Settings screen of your Site asset.
- Scroll down to the Create New User Defined Design section, and add our new menu design asset with the Design Code of "menu".

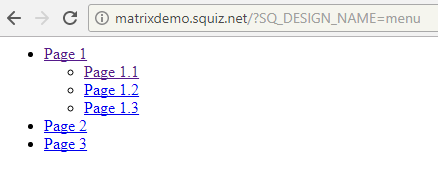
If we now preview the Site asset with ?SQ_DESIGN_NAME=menu in the URL, we should only see our menu printing. Something like this:
Including our Menu as an ESI
Now we can update our main site design to render the menu using an ESI tag instead of inline menu design tags.
- Find where your menu is being printed in your site design. In the Project Template it will look something like this:
- Replace the whole
menu_normaldesign area with just:<esi:include src="%globals_site_url%?SQ_DESIGN_NAME=menu"/> <!-- Main Menu-->
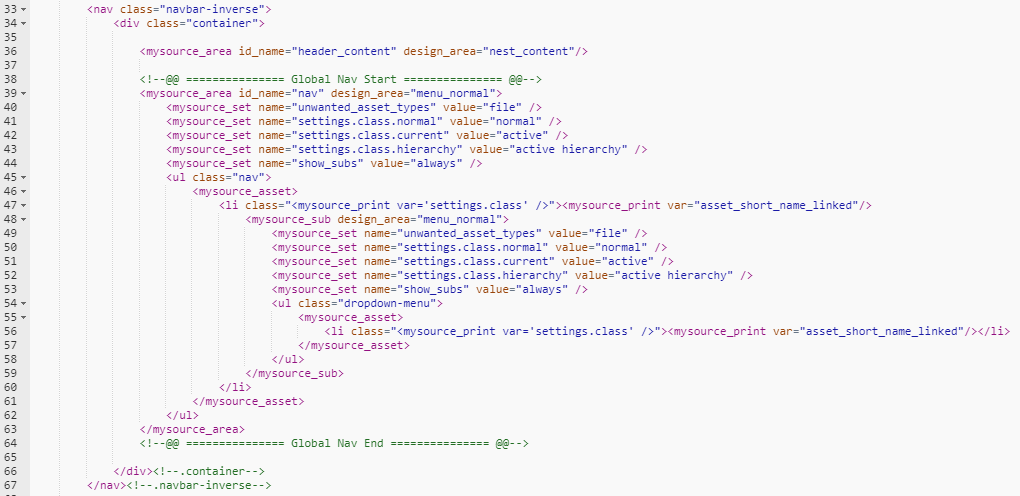
You should end up with something like this:

If we now preview our Site, we shouldn't really see any differences, as the menu should be printed the same way as it was before.
Adding Active Classes
If you have a keen eye, you might have noticed that our new Main Menu (ESI) design doesn't have the mysource_set tags for printing the "active" class. This is because the menu area, in this state, doesn't actually know which asset is currently getting printed on the frontend.
To achieve this functionality, we can use the ESI arguments feature.
When we include the ESI tag in our design, we can pass some additional information about the current page that the user is viewing, using standard Matrix keywords. We can pass these as ESI arguments that the menu design can then interpret and use to print conditional content.
Because our menu goes down to 2 levels, we need to pass two values to the ESI tag:
- The URL of the current level 1 section.
- The URL of the current level 2 section.
We can do this by using these keywords:
%frontend_asset_linking_lineage^index:1^as_asset:asset_url%%frontend_asset_linking_lineage^index:2^as_asset:asset_url%
For example, if the current URL of the page is https://www.site.com/about/our-history/2000 , the above keywords would print:
https://www.site.com/abouthttps://www.site.com/about/our-history
Let's add these keywords onto our ESI URL as two separate ESI arguments (which makes the tag pretty long):
<esi:include src="%globals_site_url%?SQ_DESIGN_NAME=menu&esi_section1=%frontend_asset_linking_lineage^index:1^as_asset:asset_url%&esi_section2=%frontend_asset_linking_lineage^index:2^as_asset:asset_url%"/>
We can now use these ESI arguments in our menu design area to print some conditional content based on their values.
We do that by using the <esi:choose> tag to print the "active" class for each level of the menu, if the menu item's URL matches our section URL.
<li class="<esi:choose><esi:when test="$(ESI_ARGS{section1}) == '<mysource_print var='asset_link'/>'">active</esi:when></esi:choose>">
This code is basically checking if the value of ESI argument section1 is equal to the current menu item link being printed, if it is, print the string 'active'.
So if we apply that to both of our menu levels, we'll end up with a menu design area looking something like this:
<mysource_area id_name="nav" design_area="menu_normal">
  <mysource_set name="show_subs" value="always" />
  <ul class="nav">
    <mysource_asset>
      <li class="nav-item <esi:choose><esi:when test="$(ESI_ARGS{section1}) == '<mysource_print var='asset_link'/>'">active</esi:when></esi:choose>">
        <a href="<mysource_print var='asset_link'/>" class="nav-link"><mysource_print var='asset_short_name'/></a>
          <mysource_sub design_area="menu_normal">
          <mysource_set name="show_subs" value="always" />
          <ul class="dropdown-menu">
            <mysource_asset>
              <li class="nav-item <esi:choose><esi:when test="$(ESI_ARGS{section2}) == '<mysource_print var='asset_link'/>'">active</esi:when></esi:choose>">
                <a href="<mysource_print var='asset_link'/>" class="nav-link"><mysource_print var='asset_short_name'/></a>
              </li>
            </mysource_asset>
          </ul>
        </mysource_sub>
      </li>
    </mysource_asset>
  </ul>
</mysource_area>
If you now navigate around the different pages of your site, you should see the active class correctly be applied based on which page and section of the site you are viewing.
This concept can take a while to get your head around, but once you do, you can apply this method to many other implementation challenges.
Every time you now do a hard-refresh on any page, it will also clear the cache on the main menu and update that on any other page it's used on. You could also use a Trigger to clear the Edge cache on the URL of the menu ESI tag whenever a level-1 or level-2 page has it's name or URL updated.